When designer Veere Grenney bought his house in Tangier, it was not only the breathtaking hilltop location with its captivating… Read More
The post At Home with Veere Grenney in his Extraordinary Gardens in Tangier appeared first on Quintessence.

When designer Veere Grenney bought his house in Tangier, it was not only the breathtaking hilltop location with its captivating… Read More
The post At Home with Veere Grenney in his Extraordinary Gardens in Tangier appeared first on Quintessence.
Nantucket by Design, one of the most highly anticipated design events of the summer season, is only three months away… Read More
The post Nantucket by Design 2025 appeared first on Quintessence.
Always one of the early highlights of the arts season in New York, The Winter Show opened last night at… Read More
The post The Winter Show 2025 appeared first on Quintessence.

Tag along to Tangier for a behind the scenes visit with designer Veere Grenney at Gazebo, his extraordinary Moroccan home… Read More
The post At Home with Veere Greeney in Tangier, Morocco appeared first on Quintessence.

Naturally, controlling squash bugs may be one of the biggest challenges for gardeners. In this blog post, I will teach you how to get rid of squash bugs naturally and without chemicals.
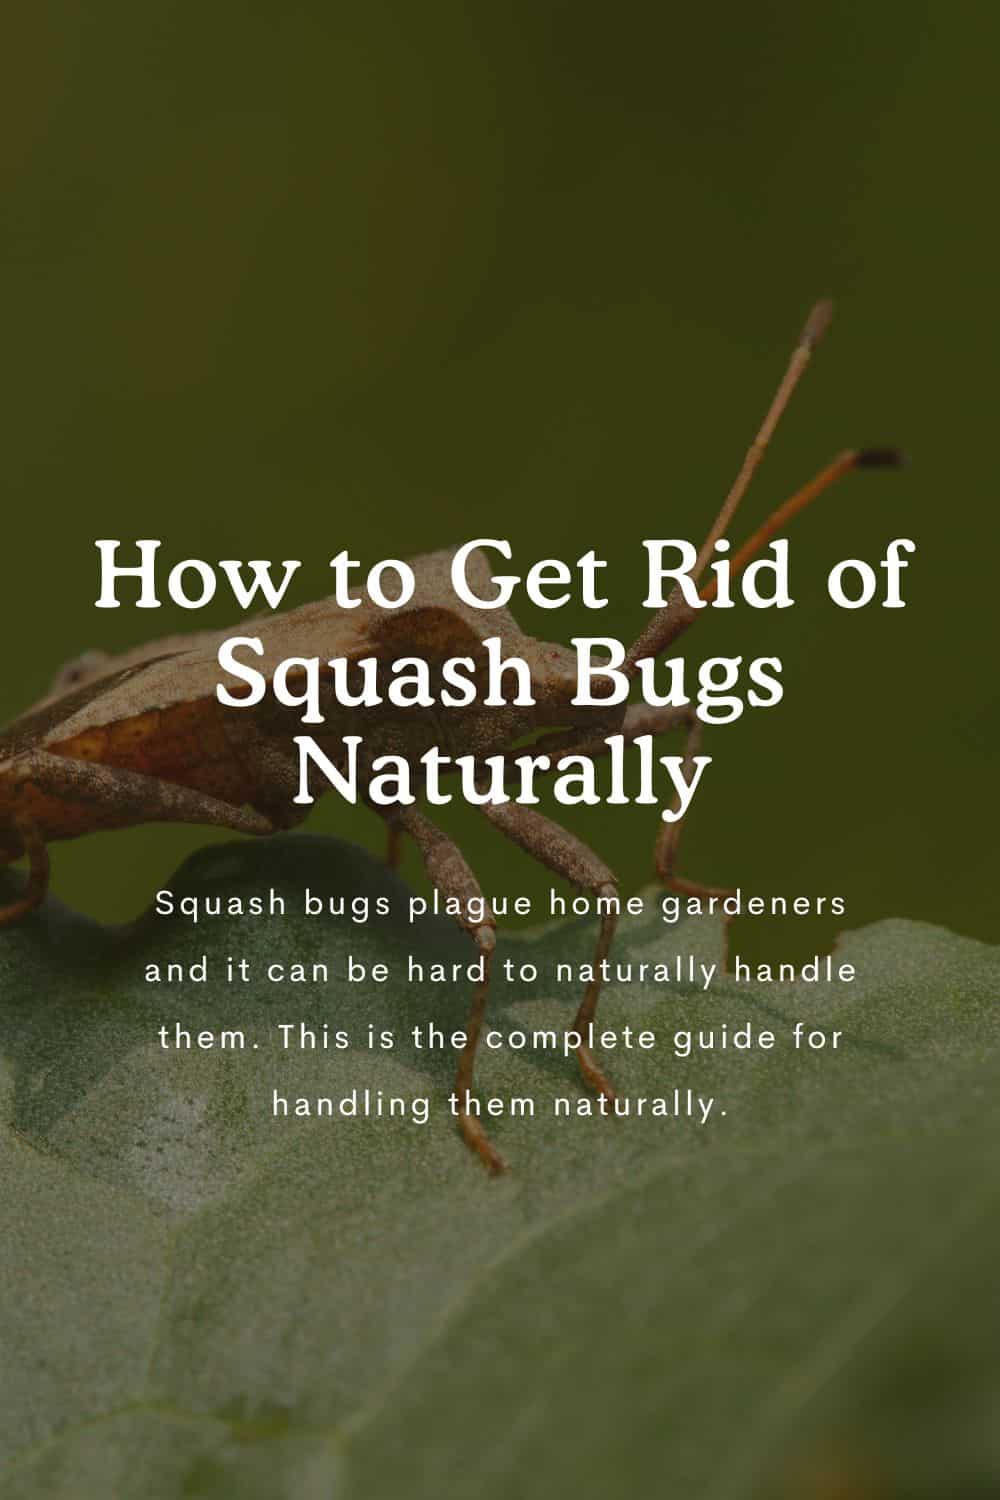
Squash bugs are one of my personal enemies in the garden. Surprisingly I find these pests to be one of the worst and hardest to handle in the garden as a natural gardener. Over the years, as I have watched many pumpkins, zucchini, Hubbard, and other squashes become demolished by these pests, I have learned some key tricks that really make a difference in controlling them.
Squash has a tendency to have quite a few different pests, including aphids. If you are wondering how to handle them, you can read about naturally controlling aphids on your squash plants here.
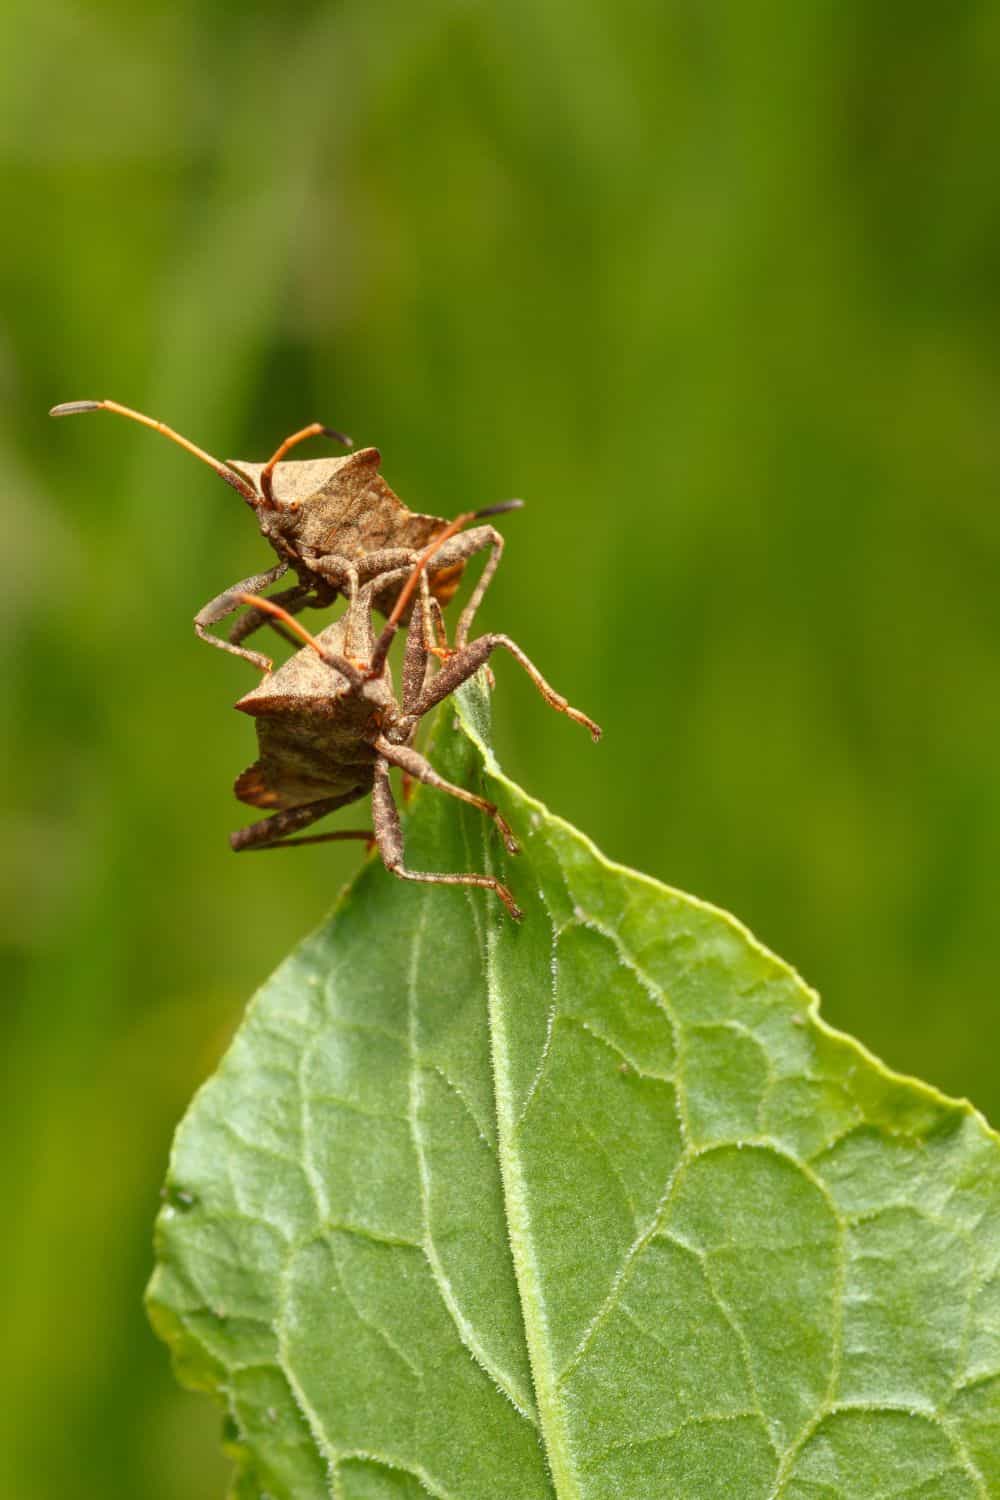
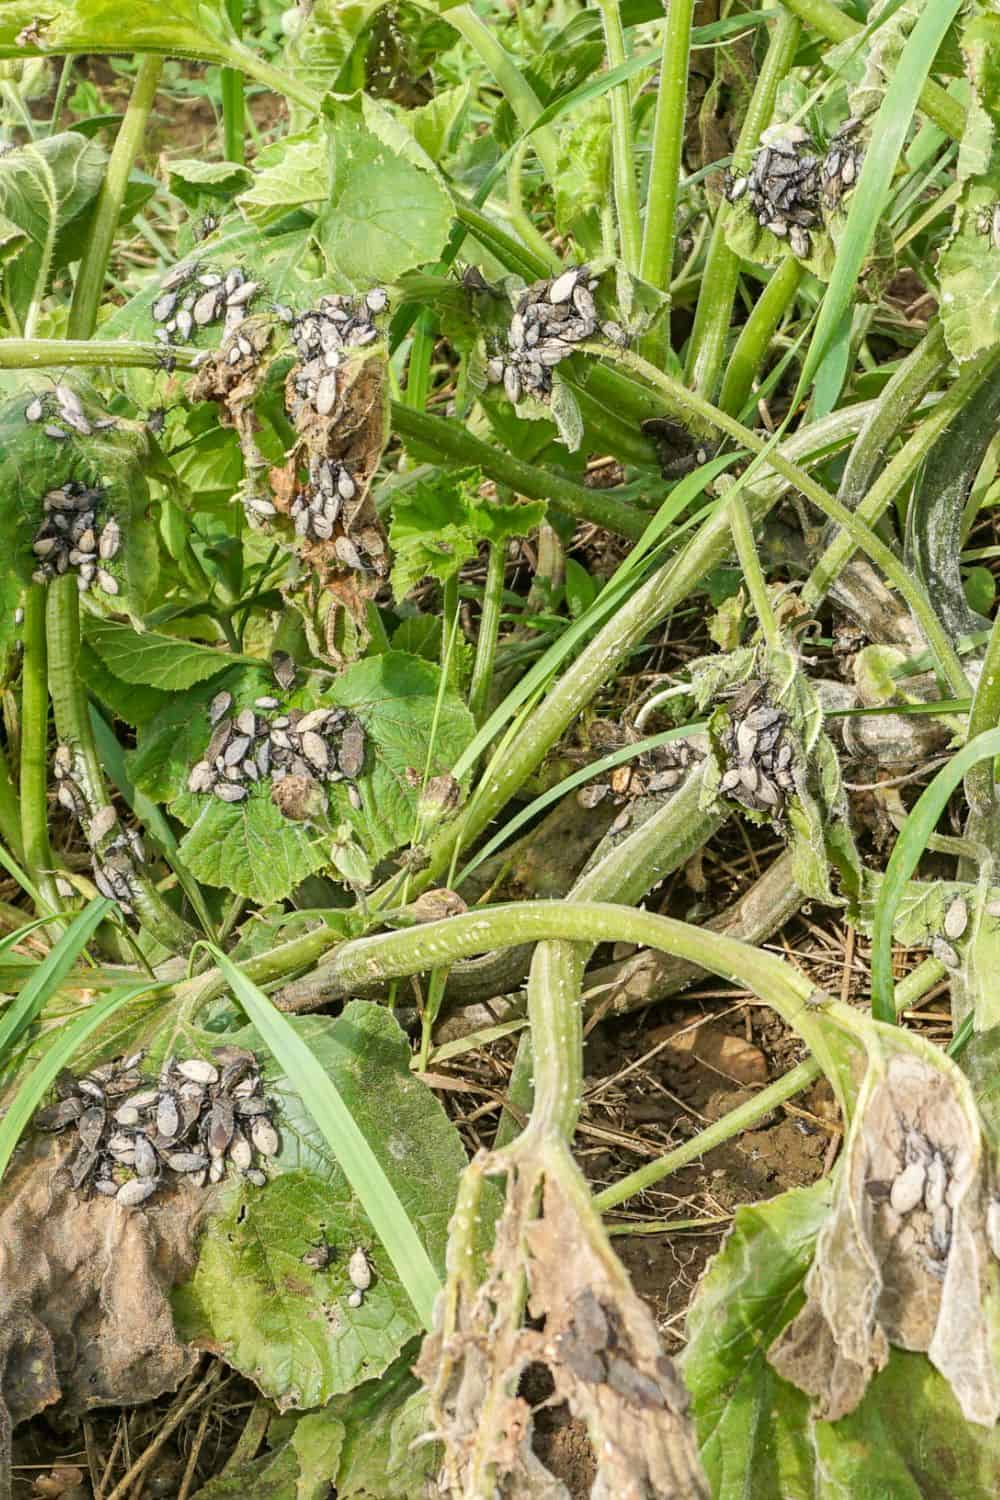
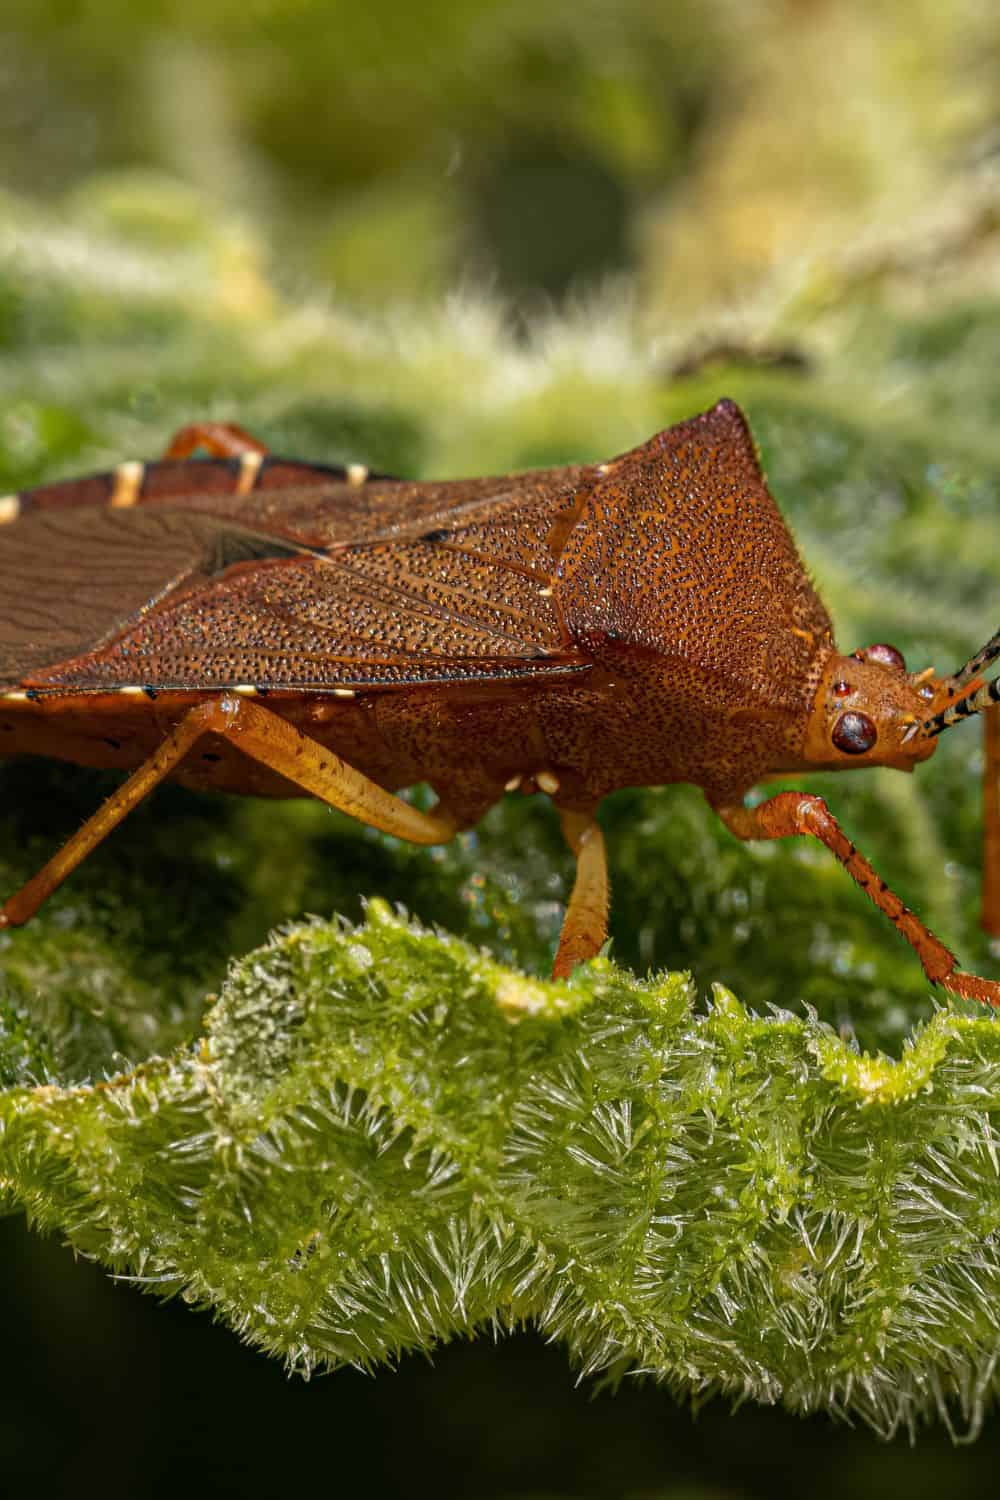
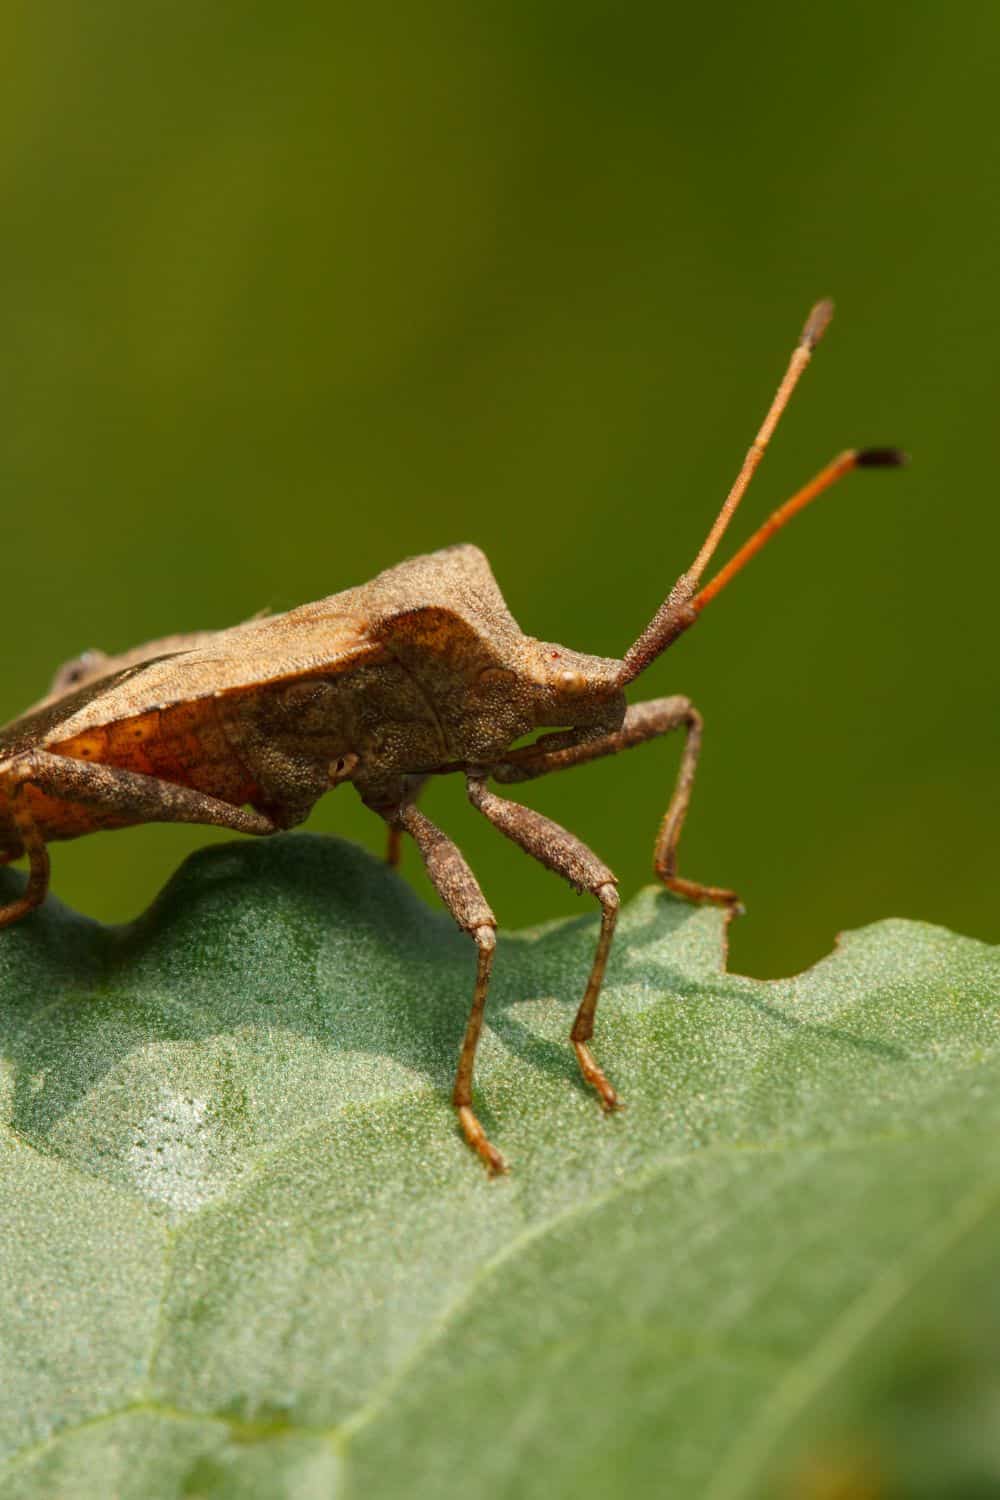
Squash bugs are sometimes a common pest of squash, pumpkin, and other cucurbit plants such as zucchini and cucumbers. They are large, brown insects with orange stripes on their abdomens and omit a foul order whenever they are disturbed. Squash bugs’ main food source is the sap of plants, which can cause wilting, yellowing, and even death. They can smell CO2 and are naturally drawn to actively growing plants. Not only are they destructive to plants through their feeding, but they can also transmit diseases.
Squash bugs fly, and their eggs are nearly impossible to squash, so they have many resiliencies to them. Squash bugs are also more commonly known as stink bugs because of the foul order they omit when they are touched.

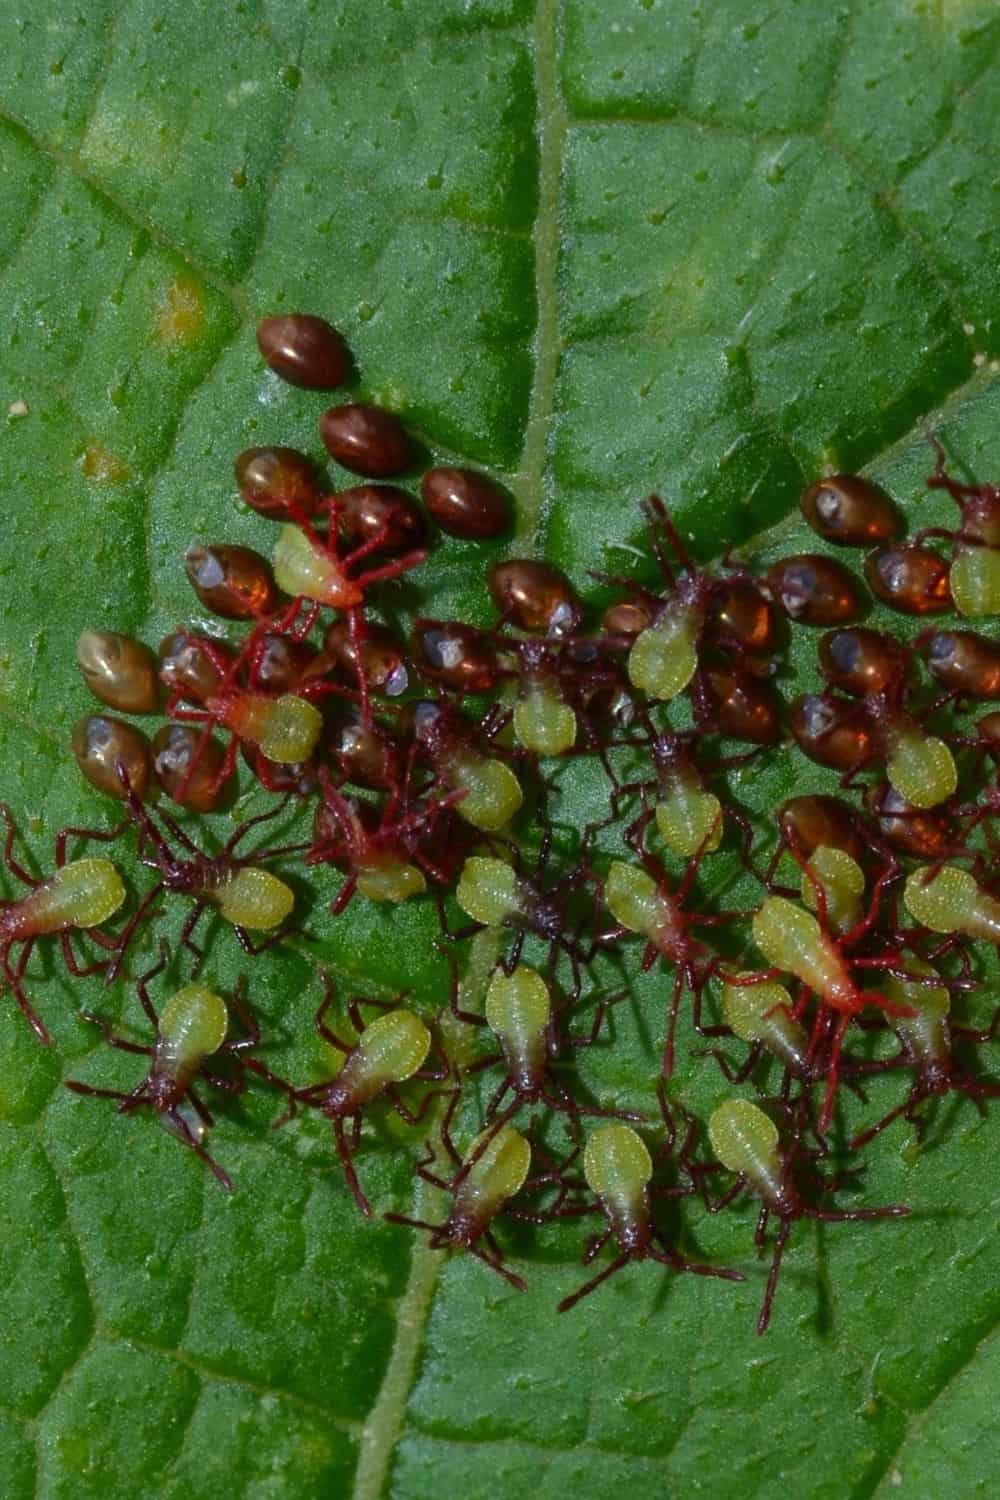
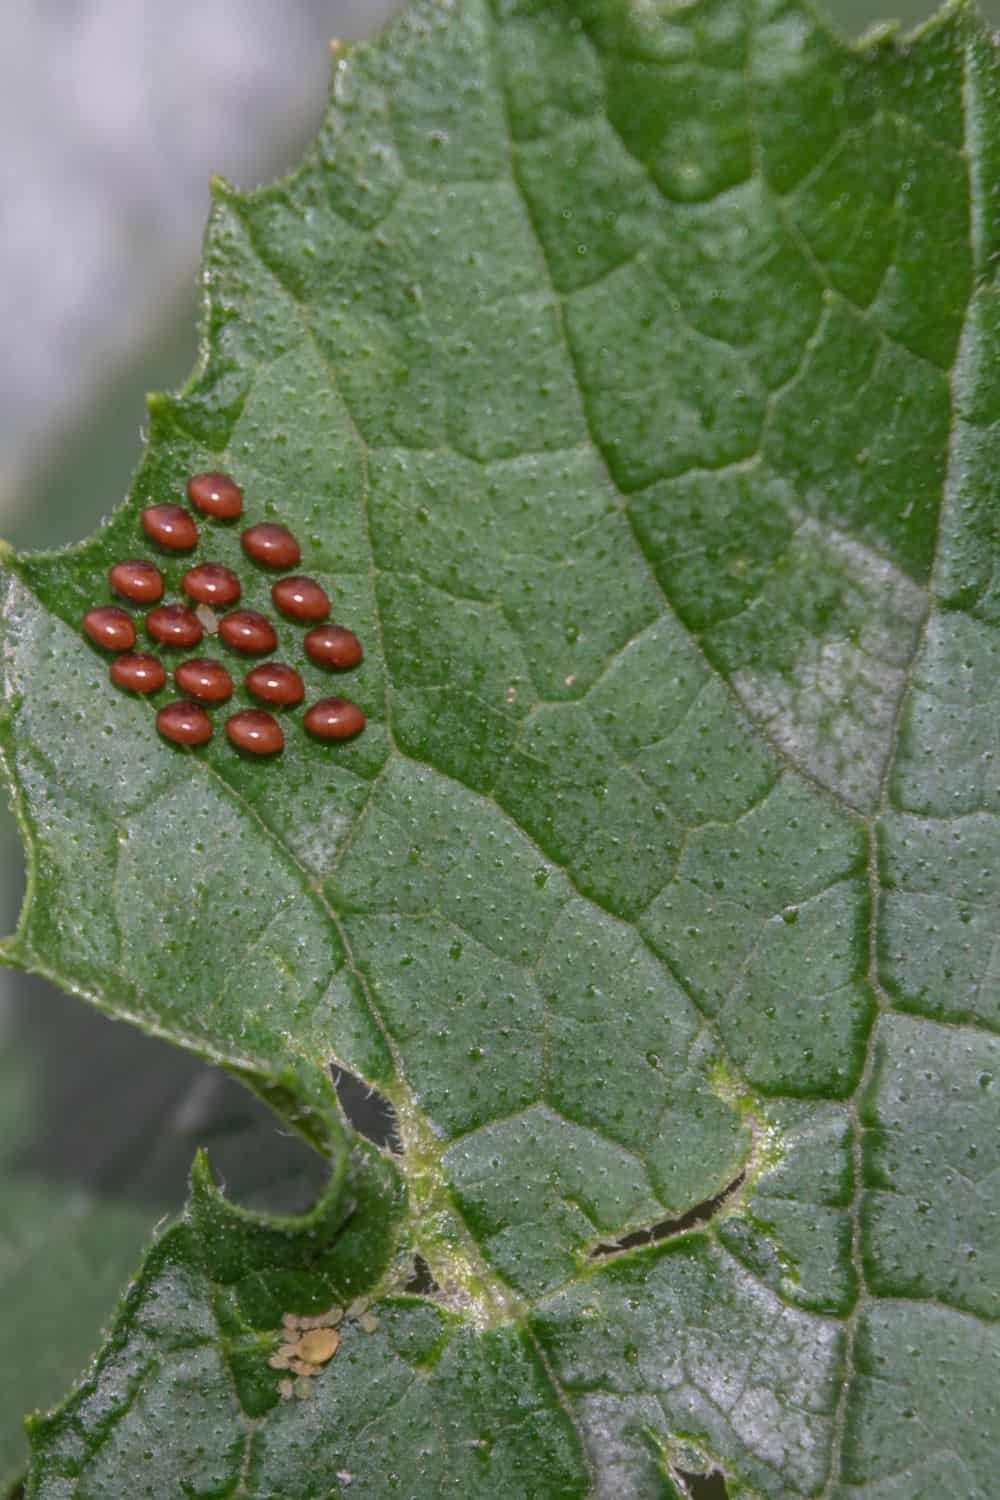
Squash bugs will complete the life cycle in about 6-8 weeks. In northern climates, there is only one generation per year. In warmer climates, there may be two or three generations per year. Since they can overwinter in protected areas, such as under leaves, in debris, or in buildings. In the spring, they emerge and begin laying eggs. The eggs hatch into nymphs, which go through five stages before adulthood. Adults can live for several months and can reproduce throughout the entire summer.
Here are all the stages of the squash bug life cycle:
Understanding the whole life cycle and stages of the squash bug can help us know how to handle them and when. Since the adults have a harder shelled body, they are harder to kill than the nymphs can be.
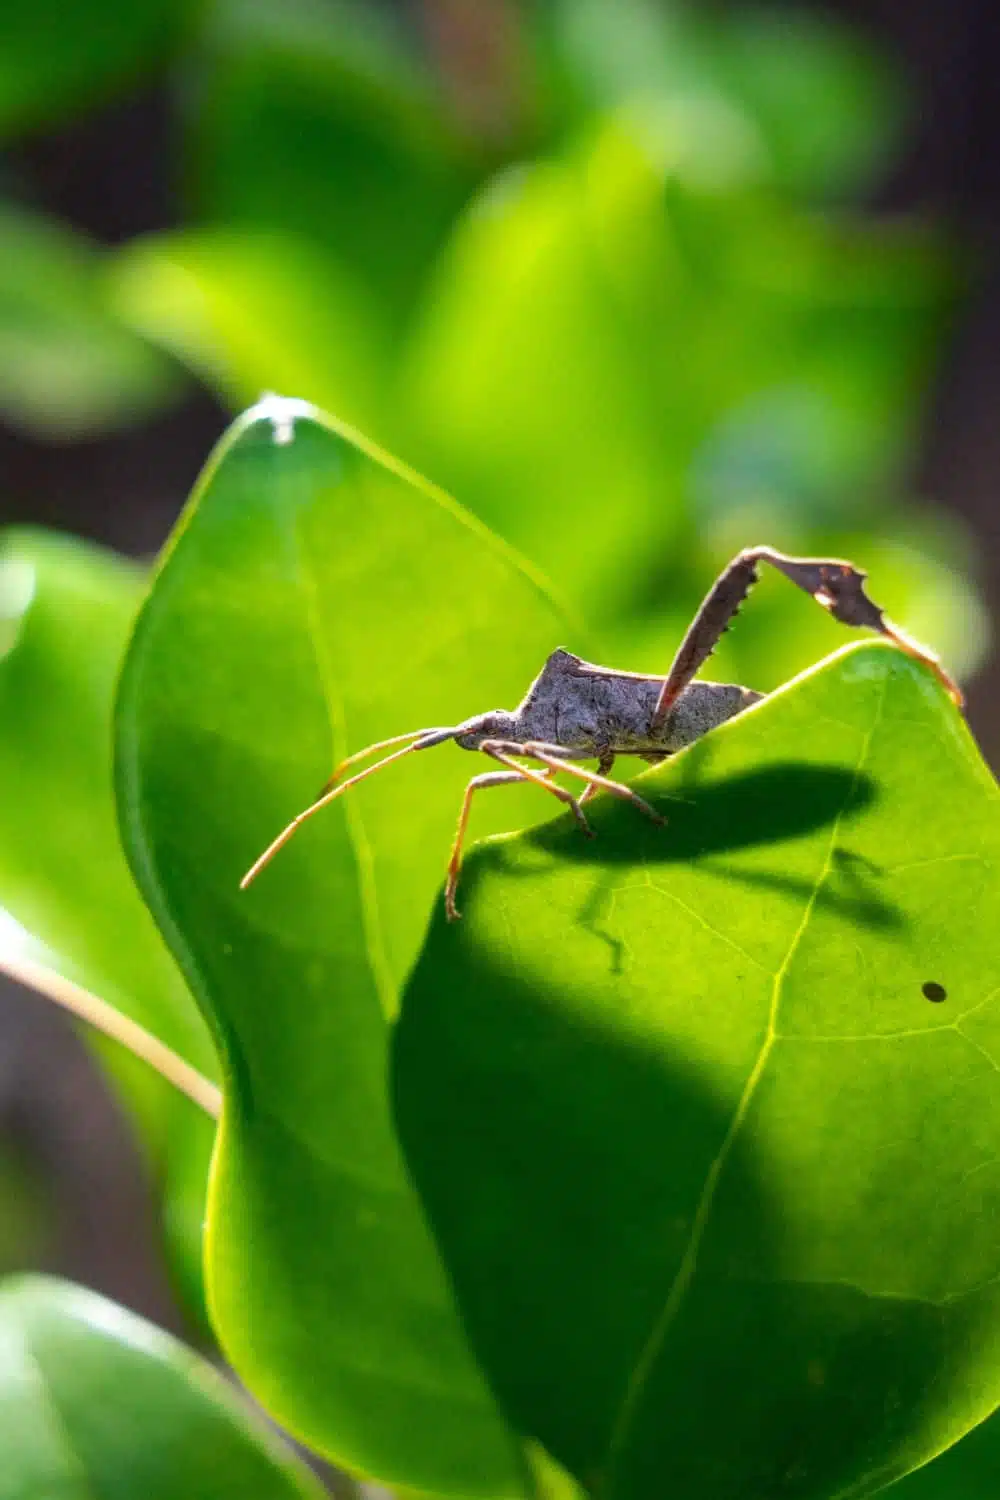
The different stages of a squash bug each has identifying factors, which can help us pay closer attention and detect the squash bug earlier in their life cycle. Thus, we can keep them in check so our plants can produce and be healthy before the squash bug takes over.
Here are the different stages and how to identify them clearly:
Identifying these different stages has been critical to choosing which natural method for controlling squash bugs is necessary.
Sometimes the sign that something is wrong means we may be too late for our plants. The damage is usually a sign our squash plant may be in serious distress. Even a healthy plant can not withstand the destruction of the squash bug. These bugs inject a toxin into the plant so they can suck the sap from the stems and leaves through their mouthparts, this damage can become evident through the following signs:
The sign of squash bug damage is disheartening, but if you can remove the squash bugs quickly before it gets worse and then get rid of any struggling parts of the plants, you usually can recover the plant without issue, but it will take diligence on the part of the gardener.
To get rid of squash bugs naturally, you must use the following methods to keep them in check. The key is paying close attention to your squash plants early in their life in your garden. If you pay attention, you can usually offset the potential damage to the plant.
These methods are the ones I have been using for years that have worked. I cannot recommend them enough to maintain low populations and healthy squash harvests in a naturally grown garden.
Insecticides actually do not work against squash bugs. This is because squash bugs have actually built up a resistance to insecticides. The sprays typically only control the adults, not the nymphs or eggs. With the rate the squash bugs multiply, this may do very little while doing more harm to the environment and other beneficial bugs in your garden.
Squash bugs plague many home gardeners, but if you pay attention, you can actually keep their population low and easy to manage so you can have some very successful squash harvests this year! Naturally, handling squash bugs is the best way, not just for your and your garden’s health but because insecticides don’t affect squash bugs.
If you find this post helpful, you may also consider these posts:
Naturally, controlling squash bugs may be one of the biggest challenges for gardeners. In this blog post, I will teach you how to get rid of squash bugs naturally and without chemicals.
Squash bugs are one of my personal enemies in the garden. Surprisingly I find these pests to be one of the worst and hardest to handle in the garden as a natural gardener. Over the years, as I have watched many pumpkins, zucchini, Hubbard, and other squashes become demolished by these pests, I have learned some key tricks that really make a difference in controlling them.
Squash has a tendency to have quite a few different pests, including aphids. If you are wondering how to handle them, you can read about naturally controlling aphids on your squash plants here.
Squash bugs are sometimes a common pest of squash, pumpkin, and other cucurbit plants such as zucchini and cucumbers. They are large, brown insects with orange stripes on their abdomens and omit a foul order whenever they are disturbed. Squash bugs’ main food source is the sap of plants, which can cause wilting, yellowing, and even death. They can smell CO2 and are naturally drawn to actively growing plants. Not only are they destructive to plants through their feeding, but they can also transmit diseases.
Squash bugs fly, and their eggs are nearly impossible to squash, so they have many resiliencies to them. Squash bugs are also more commonly known as stink bugs because of the foul order they omit when they are touched.
Squash bugs will complete the life cycle in about 6-8 weeks. In northern climates, there is only one generation per year. In warmer climates, there may be two or three generations per year. Since they can overwinter in protected areas, such as under leaves, in debris, or in buildings. In the spring, they emerge and begin laying eggs. The eggs hatch into nymphs, which go through five stages before adulthood. Adults can live for several months and can reproduce throughout the entire summer.
Here are all the stages of the squash bug life cycle:
Understanding the whole life cycle and stages of the squash bug can help us know how to handle them and when. Since the adults have a harder shelled body, they are harder to kill than the nymphs can be.
The different stages of a squash bug each has identifying factors, which can help us pay closer attention and detect the squash bug earlier in their life cycle. Thus, we can keep them in check so our plants can produce and be healthy before the squash bug takes over.
Here are the different stages and how to identify them clearly:
Identifying these different stages has been critical to choosing which natural method for controlling squash bugs is necessary.
Sometimes the sign that something is wrong means we may be too late for our plants. The damage is usually a sign our squash plant may be in serious distress. Even a healthy plant can not withstand the destruction of the squash bug. These bugs inject a toxin into the plant so they can suck the sap from the stems and leaves through their mouthparts, this damage can become evident through the following signs:
The sign of squash bug damage is disheartening, but if you can remove the squash bugs quickly before it gets worse and then get rid of any struggling parts of the plants, you usually can recover the plant without issue, but it will take diligence on the part of the gardener.
To get rid of squash bugs naturally, you must use the following methods to keep them in check. The key is paying close attention to your squash plants early in their life in your garden. If you pay attention, you can usually offset the potential damage to the plant.
These methods are the ones I have been using for years that have worked. I cannot recommend them enough to maintain low populations and healthy squash harvests in a naturally grown garden.
Insecticides actually do not work against squash bugs. This is because squash bugs have actually built up a resistance to insecticides. The sprays typically only control the adults, not the nymphs or eggs. With the rate the squash bugs multiply, this may do very little while doing more harm to the environment and other beneficial bugs in your garden.
Squash bugs plague many home gardeners, but if you pay attention, you can actually keep their population low and easy to manage so you can have some very successful squash harvests this year! Naturally, handling squash bugs is the best way, not just for your and your garden’s health but because insecticides don’t affect squash bugs.
If you find this post helpful, you may also consider these posts:
Cabbage worms and cabbage moths can create real issues in your garden, and you may be wondering how to get rid of cabbage worms because of the destruction they cause. It will bring you a lot of relief to know that it is simple and easy to organically get rid of cabbage worms and cabbage moths from your garden.
Cabbage worms and moths are among the pests I hear about the most from other gardeners. These green caterpillars quickly develop and can ravage the leaves of any and all brassicas plants. This would include broccoli, kale, turnips, cabbage, cauliflower, kohlrabi, collards, and Brussels sprouts. A whole head of cabbage can go bad with just a few cabbage moths.
Also, cabbage moths are among the earliest bugs to reveal themselves in the spring. This means that even before frost has passed, your kale may be in danger of being harmed by cabbage moths and worms.
The truth is there is plenty we can do in a low-intervention or natural way to deter cabbage moths from beginning with, and even more so, there is plenty we can do to get rid of cabbage moths in our gardens.
As with any pest, from deer to aphids, you can find a way to organically handle the pest without harm to yourself or other beneficial visitors to your garden. Organic gardening uses naturally derived products to deter pests and encourage plant growth. Though I practice these methods, we go even further in our garden and believe in back-to-nature or low-intervention style gardening. This means we work with nature to deter and handle pests. Building a healthy ecosystem is the number one goal in our garden. So all of these solutions revolve around working with nature and not harming it, even naturally.
In fact, you can read about some of the best companion plants for broccoli, which also work to deter cabbage worms naturally.
First, let’s learn more about cabbage moths and cabbage worms.
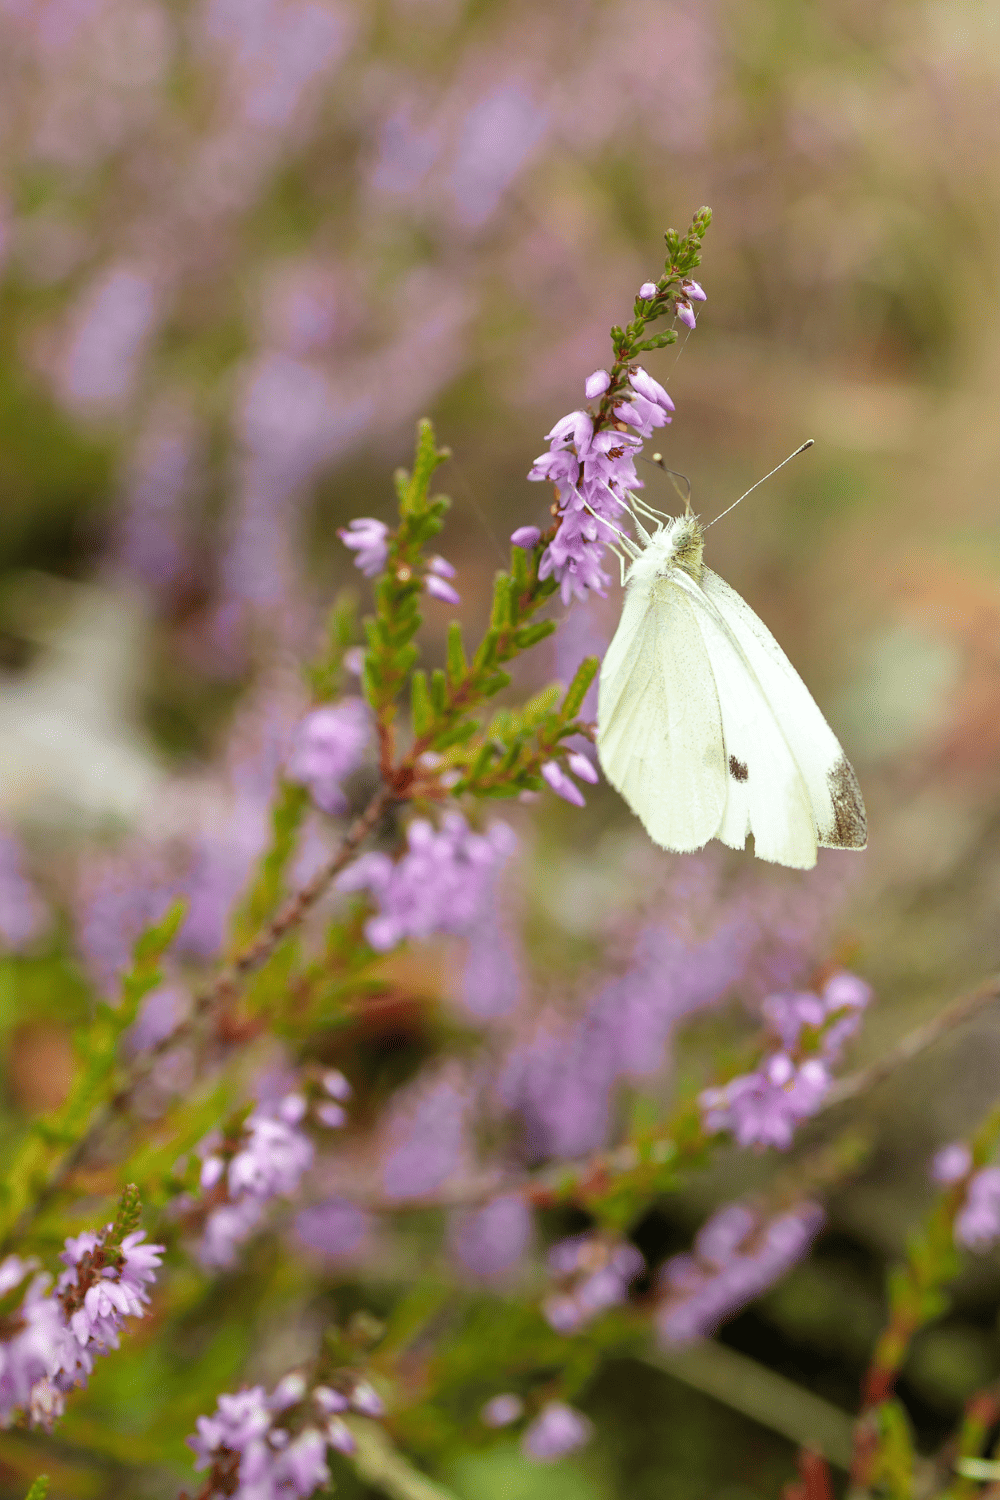
A cabbage moth is a small, white moth that is a common pest of cabbage and other brassica vegetables. The adult moth lays its eggs on the underside of leaves, and the larvae (caterpillars) that hatch from these eggs feed on the leaves, causing significant damage. It can appear in early April or whenever the weather consistently reaches above 50 degrees as a high.
A cabbage moth can lay between 200 -2,500 eggs in its lifetime. The eggs will usually hatch within 5-12 days and feed quickly on any sort of cabbage or brassica they can find.
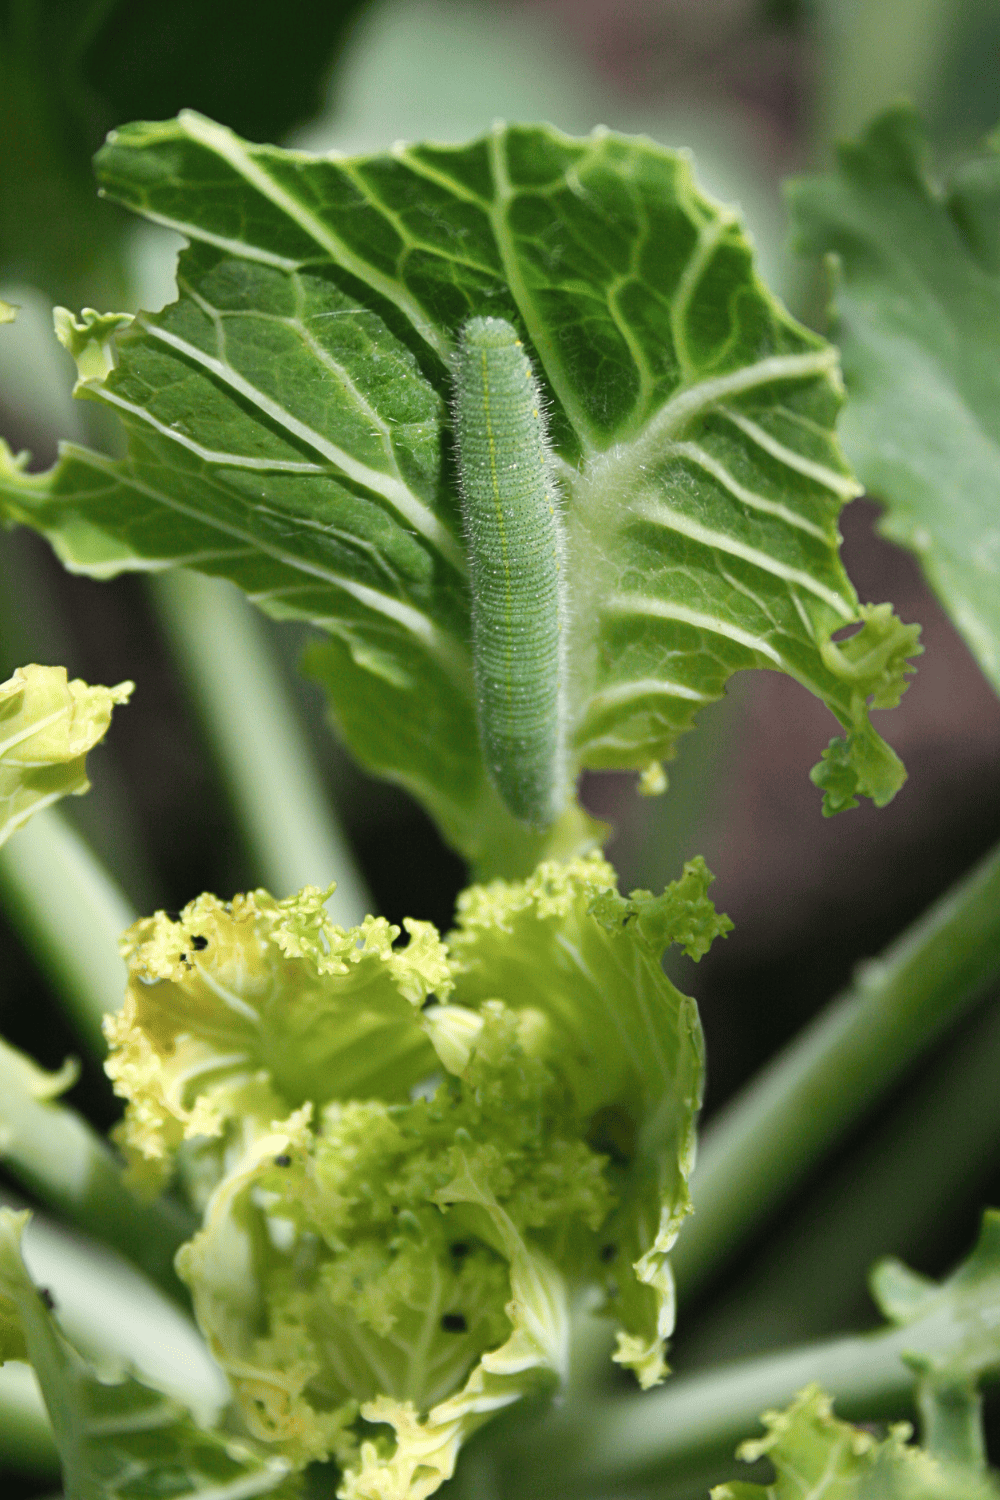
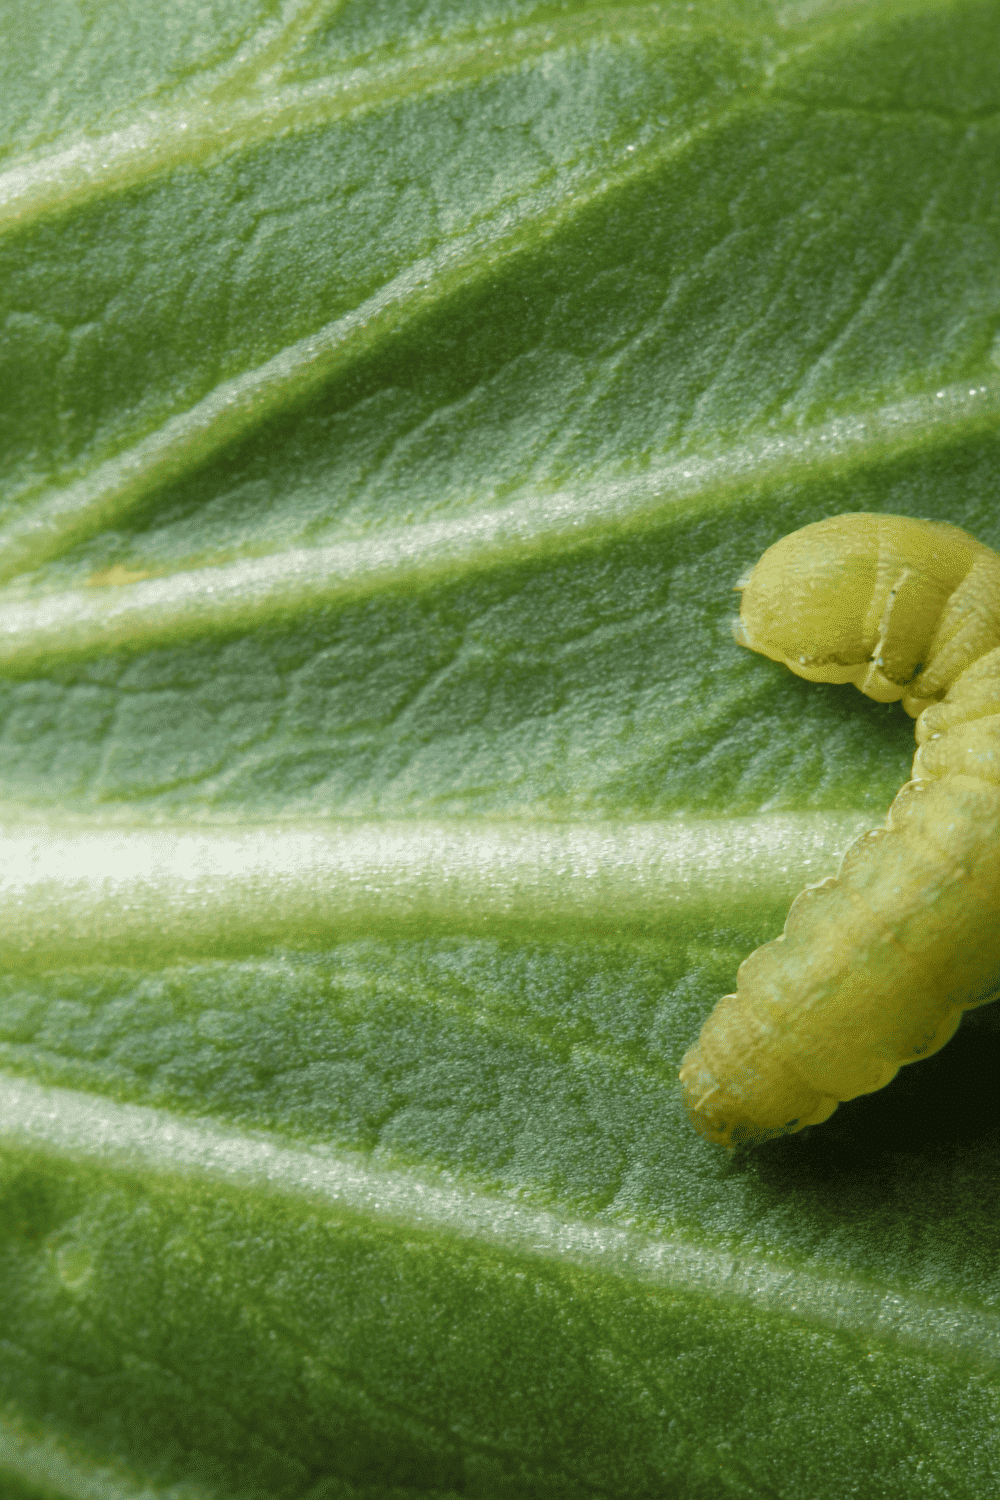
Cabbage worms are the larvae of the cabbage moth. They are green or yellow-green in color, with a few faint yellow stripes. They are about 1 inch long when fully grown. Cabbage worms feed voraciously on cabbage and other brassica vegetables, and they can quickly destroy a crop.
Here are some of the key features that can help you identify cabbage moths and cabbage worms:
You can find them by regularly checking your brassicas for the following:
If you see any of these things. You will want to continue and learn the natural ways to help your plants recover and continue their growth.
If you have discovered that you have cabbage worms in your garden, you will want to take one or more of the following measures. These are the best ways to get rid of cabbage worms naturally from your garden.
Read more below on each of these methods to figure out which ones are right for you to get rid of cabbage worms in your garden naturally.
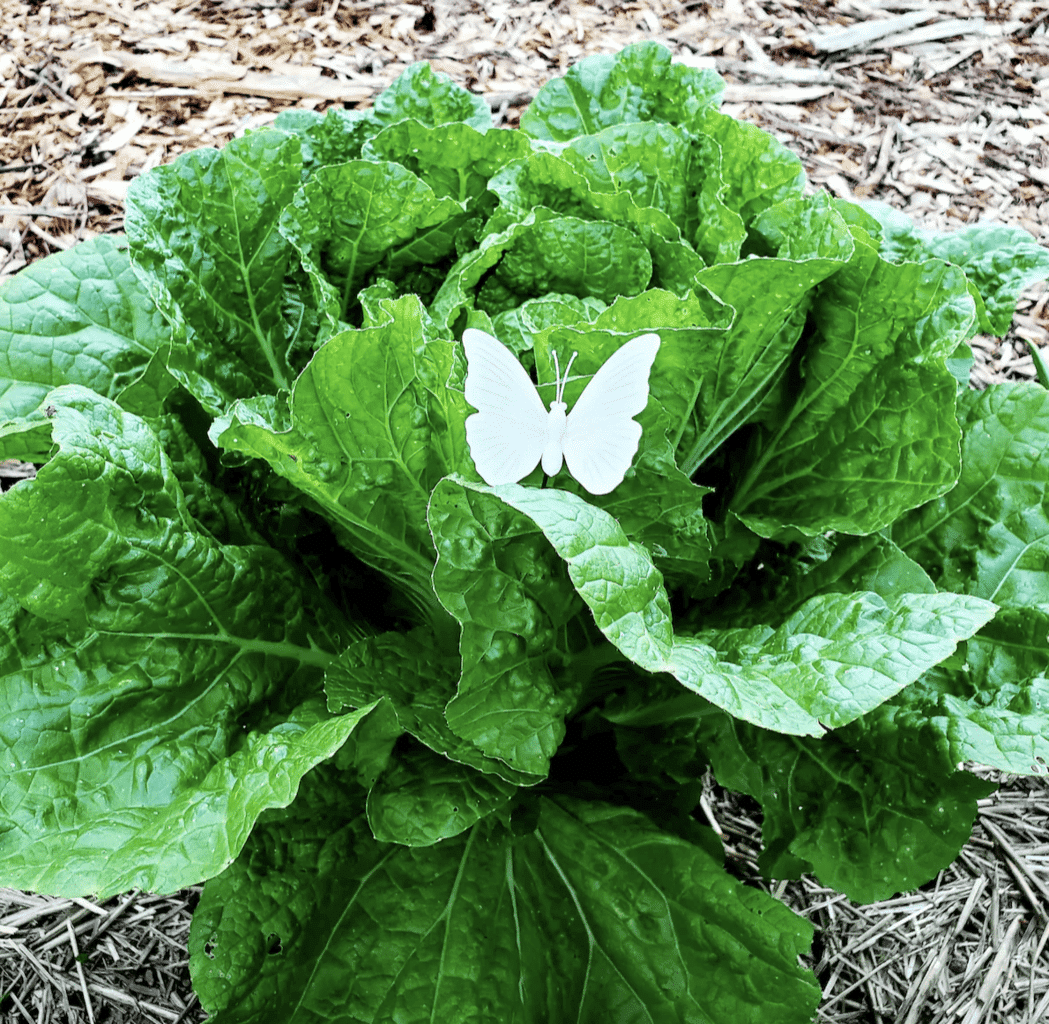
This method has worked and does work. Since Cabbage moths are territorial, they will not lay their larvae where there are pretend or fake moths. You can make them yourself, or you can buy them as well.
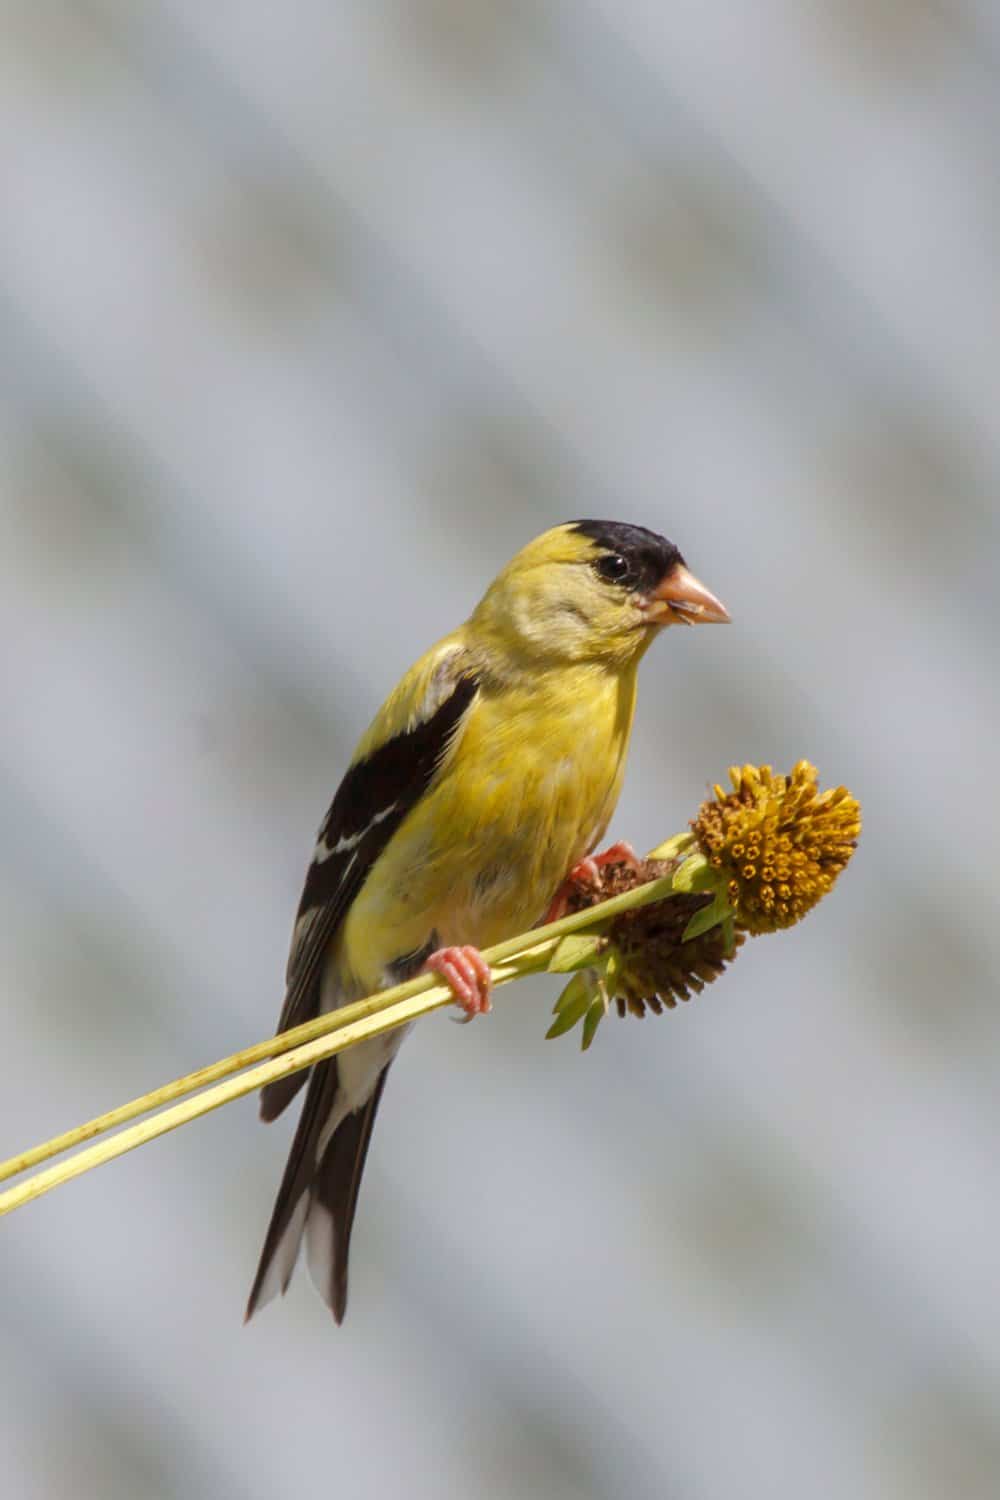
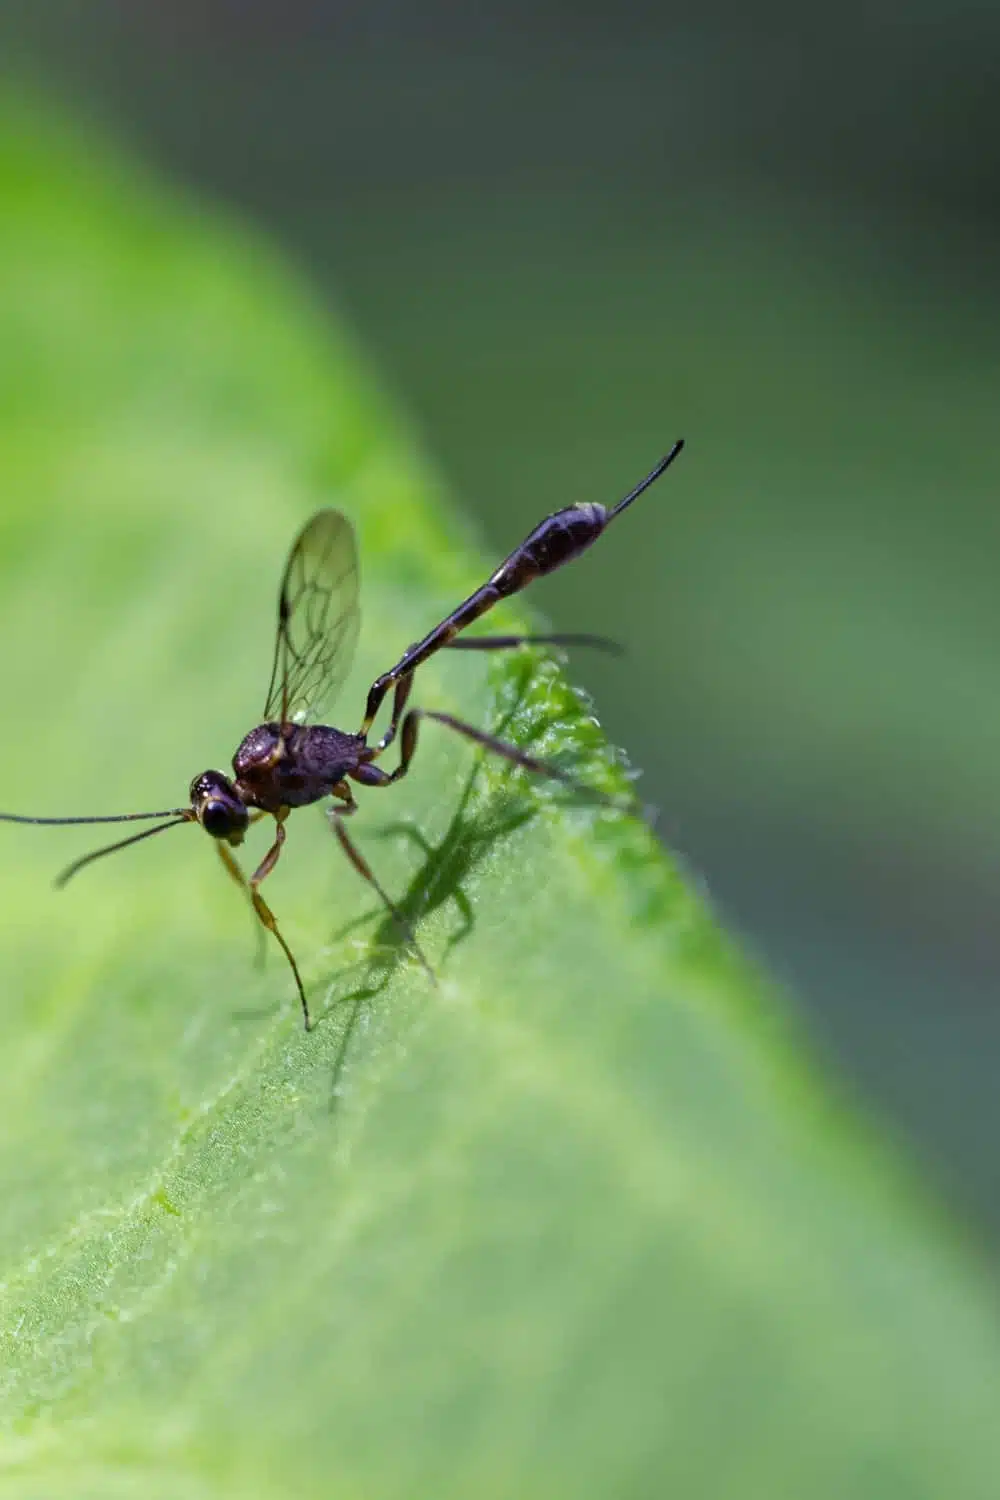
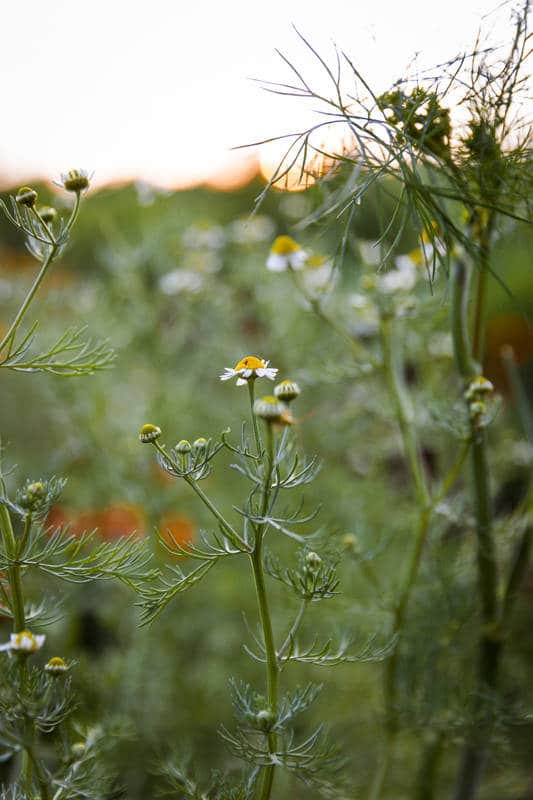
There are lots of great predators for the cabbage worm we can bring in. For instance, the parasitic wasp is a great beneficial insect that can handle the influx of cabbage worms in your garden. You can bring them in by growing cilantro, dill, fennel, daisies, and asters in your garden. You can also make sure to encourage a strong bird population so that robins, bluebirds, and bluejays find their way to the worms in your garden.
Brassicas are one of the easiest plants to companion plants in your garden. They also lend beautifully to the system and respond very well. Some have less dramatic responses, but brassicas like kale and broccoli do exceptionally well with them. You can find an extensive post about what plants to put with companion plants. You can also take our companion planting class in the community as well if you would like to dig in further.
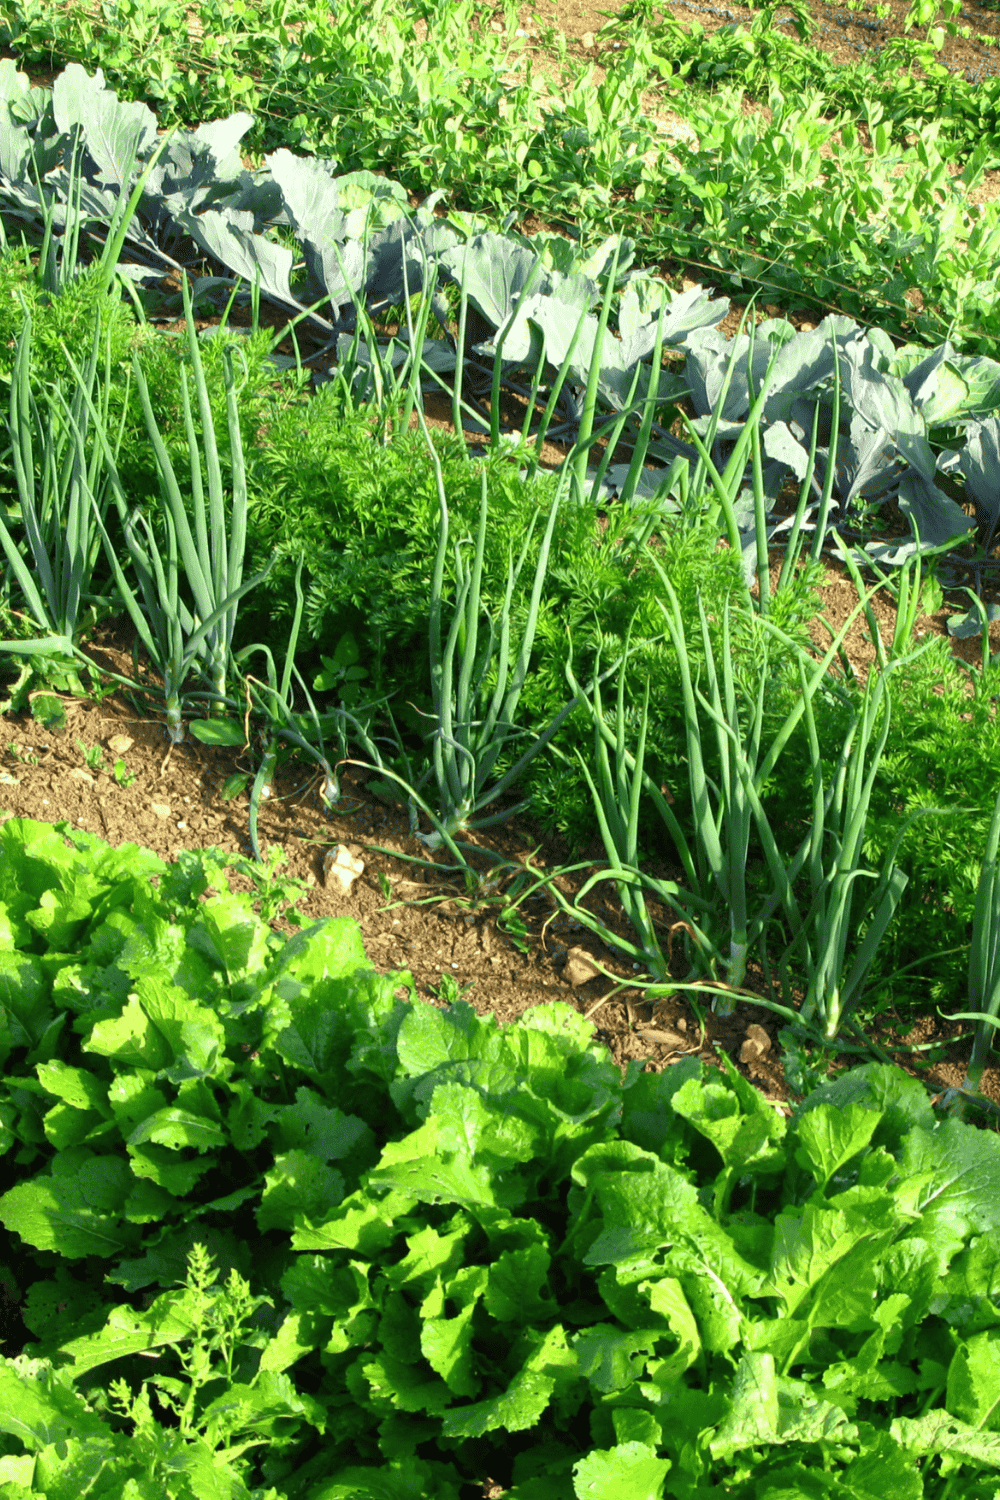
The main plants you need to focus on to deter cabbage moths are alliums (garlic, onions, shallots, and chives are all options), and then add in borage, marigolds, and a bonus to have celery in there too. Read more about the best companion plants for broccoli right here.

This one may be for you if you don’t mind touching the soft green caterpillars. Hand-removing the caterpillars is always a great way to get rid of them. If you have backyard chickens, they will love a bucket full of them and gobble them right up!
For this to be productive, you must inspect your plants frequently in order to discover them. Use the methods above how to locate them quickly.
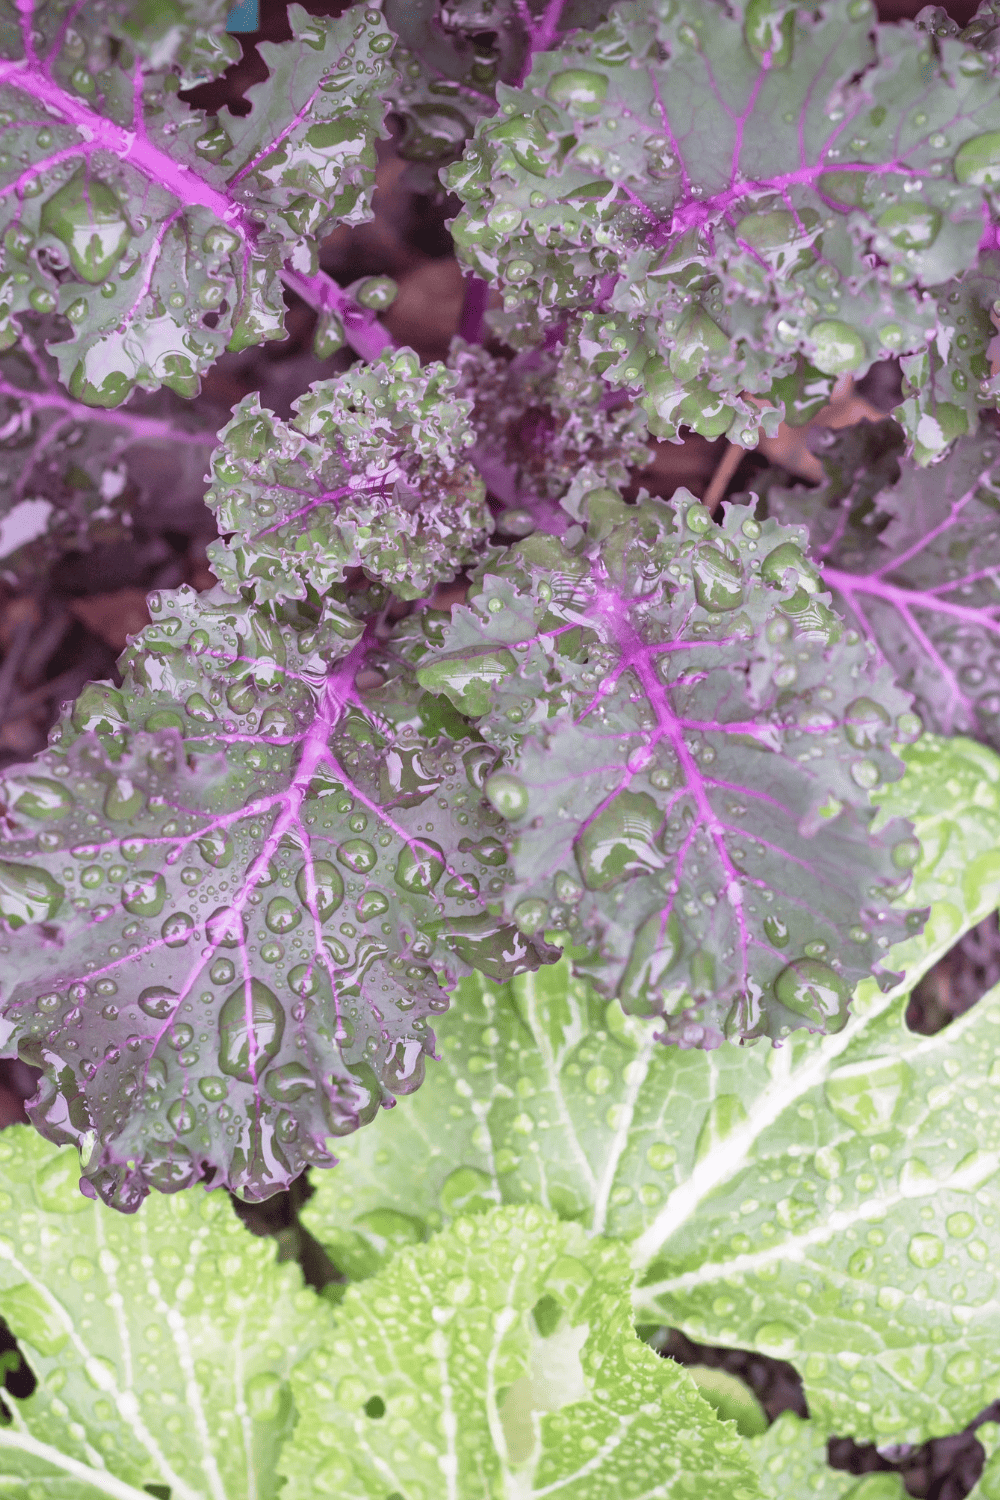
I am not sure about you, but I have found that in the garden, my purple and red-tinted plants get far less insect activity when it comes to destruction. Though bees and pollinators hunt for the purple flowers of many plants, I find that these pants also show less wear and tear than their green counterparts. That said, there have been studies that show that this is true.
One of my favorite varieties to grow in the garden is actually Red Russian Kale. It rarely has cabbage worm issues, and it tastes great as well! It isn’t purple, but it surely has purple and red tints.
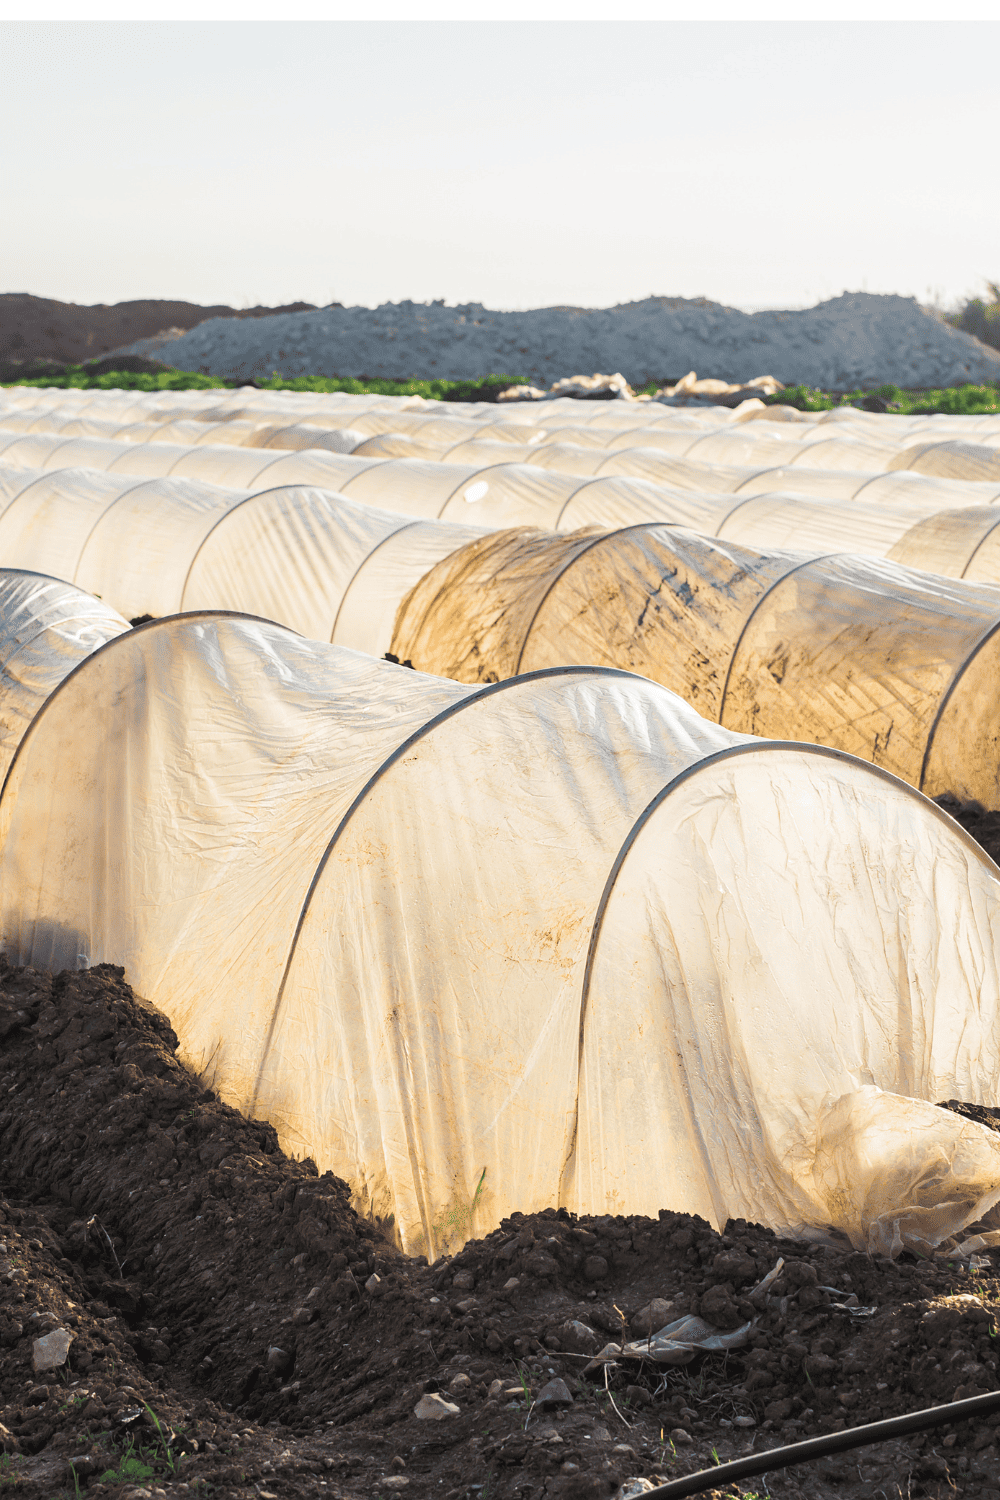
Using a row cover over your brassicas is one of the surest ways to deter cabbage moths from laying eggs on your cabbages and then seeing cabbage worms develop. Why? They cannot get through it. The cover allows light through but protects moths from getting on the plants again. If they cannot get to your cabbages, they cannot get worms. Simple and natural solution.
You can find a floating row cover here if you are wondering what to get.
I love a good bit of garden folklore. If there is something that has some, it is for sure the cabbage since it has been a staple crop for so long. I love the ones that the Farmer’s Almanac pulls up and notes. I am interested to try them at some point.

I hope this was helpful in your journey to getting rid of cabbage worms and cabbage moths this year in your garden. Remember, it is normal for some things to get bitten. If we have healthy plants, some chewing isn’t harmful. We want to keep down populations so our plants can thrive.
If you enjoyed this post, you may also like these other ones:

Cabbage worms and cabbage moths can create real issues in your garden, and you may be wondering how to get rid of cabbage worms because of the destruction they cause. It will bring you a lot of relief to know that it is simple and easy to organically get rid of cabbage worms and cabbage moths from your garden.
Cabbage worms and moths are among the pests I hear about the most from other gardeners. These green caterpillars quickly develop and can ravage the leaves of any and all brassicas plants. This would include broccoli, kale, turnips, cabbage, cauliflower, kohlrabi, collards, and Brussels sprouts. A whole head of cabbage can go bad with just a few cabbage moths.
Also, cabbage moths are among the earliest bugs to reveal themselves in the spring. This means that even before frost has passed, your kale may be in danger of being harmed by cabbage moths and worms.
The truth is there is plenty we can do in a low-intervention or natural way to deter cabbage moths from beginning with, and even more so, there is plenty we can do to get rid of cabbage moths in our gardens.
As with any pest, from deer to aphids, you can find a way to organically handle the pest without harm to yourself or other beneficial visitors to your garden. Organic gardening uses naturally derived products to deter pests and encourage plant growth. Though I practice these methods, we go even further in our garden and believe in back-to-nature or low-intervention style gardening. This means we work with nature to deter and handle pests. Building a healthy ecosystem is the number one goal in our garden. So all of these solutions revolve around working with nature and not harming it, even naturally.
In fact, you can read about some of the best companion plants for broccoli, which also work to deter cabbage worms naturally.
First, let’s learn more about cabbage moths and cabbage worms.
A cabbage moth is a small, white moth that is a common pest of cabbage and other brassica vegetables. The adult moth lays its eggs on the underside of leaves, and the larvae (caterpillars) that hatch from these eggs feed on the leaves, causing significant damage. It can appear in early April or whenever the weather consistently reaches above 50 degrees as a high.
A cabbage moth can lay between 200 -2,500 eggs in its lifetime. The eggs will usually hatch within 5-12 days and feed quickly on any sort of cabbage or brassica they can find.
Cabbage worms are the larvae of the cabbage moth. They are green or yellow-green in color, with a few faint yellow stripes. They are about 1 inch long when fully grown. Cabbage worms feed voraciously on cabbage and other brassica vegetables, and they can quickly destroy a crop.
Here are some of the key features that can help you identify cabbage moths and cabbage worms:
You can find them by regularly checking your brassicas for the following:
If you see any of these things. You will want to continue and learn the natural ways to help your plants recover and continue their growth.
If you have discovered that you have cabbage worms in your garden, you will want to take one or more of the following measures. These are the best ways to get rid of cabbage worms naturally from your garden.
Read more below on each of these methods to figure out which ones are right for you to get rid of cabbage worms in your garden naturally.
This method has worked and does work. Since Cabbage moths are territorial, they will not lay their larvae where there are pretend or fake moths. You can make them yourself, or you can buy them as well.
There are lots of great predators for the cabbage worm we can bring in. For instance, the parasitic wasp is a great beneficial insect that can handle the influx of cabbage worms in your garden. You can bring them in by growing cilantro, dill, fennel, daisies, and asters in your garden. You can also make sure to encourage a strong bird population so that robins, bluebirds, and bluejays find their way to the worms in your garden.
Brassicas are one of the easiest plants to companion plants in your garden. They also lend beautifully to the system and respond very well. Some have less dramatic responses, but brassicas like kale and broccoli do exceptionally well with them. You can find an extensive post about what plants to put with companion plants. You can also take our companion planting class in the community as well if you would like to dig in further.
The main plants you need to focus on to deter cabbage moths are alliums (garlic, onions, shallots, and chives are all options), and then add in borage, marigolds, and a bonus to have celery in there too. Read more about the best companion plants for broccoli right here.
This one may be for you if you don’t mind touching the soft green caterpillars. Hand-removing the caterpillars is always a great way to get rid of them. If you have backyard chickens, they will love a bucket full of them and gobble them right up!
For this to be productive, you must inspect your plants frequently in order to discover them. Use the methods above how to locate them quickly.
I am not sure about you, but I have found that in the garden, my purple and red-tinted plants get far less insect activity when it comes to destruction. Though bees and pollinators hunt for the purple flowers of many plants, I find that these pants also show less wear and tear than their green counterparts. That said, there have been studies that show that this is true.
One of my favorite varieties to grow in the garden is actually Red Russian Kale. It rarely has cabbage worm issues, and it tastes great as well! It isn’t purple, but it surely has purple and red tints.
Using a row cover over your brassicas is one of the surest ways to deter cabbage moths from laying eggs on your cabbages and then seeing cabbage worms develop. Why? They cannot get through it. The cover allows light through but protects moths from getting on the plants again. If they cannot get to your cabbages, they cannot get worms. Simple and natural solution.
You can find a floating row cover here if you are wondering what to get.
I love a good bit of garden folklore. If there is something that has some, it is for sure the cabbage since it has been a staple crop for so long. I love the ones that the Farmer’s Almanac pulls up and notes. I am interested to try them at some point.
I hope this was helpful in your journey to getting rid of cabbage worms and cabbage moths this year in your garden. Remember, it is normal for some things to get bitten. If we have healthy plants, some chewing isn’t harmful. We want to keep down populations so our plants can thrive.
If you enjoyed this post, you may also like these other ones:

Aphids may be one of the most devastating pests in a garden that can easily go undetected for long periods of time in the garden, but there are natural ways to get rid of aphids. Getting rid of them involves one very simple and smart solution you may not have considered. In this post, I will detail how we keep our aphid population low and in check naturally without any intervention.
Though aphids can devastate the garden, these small but mighty bugs may also be the easiest to manage with a few simple and smart solutions. Aphids are also known as plant lice, greenflies, or garden lice. They grow in packs, usually managed by ants who move them around and farm them like we do as humans with cows. The ants LOVE their sweet secretions and work together in the garden.
All pests in the garden, including aphids, have a way of controlling them with nature, and today we will discuss how to learn their weakness and cultivate this in the garden.
One of the things we need to understand about aphids is that they are also wonderful bell weathers or indicators that something isn’t going well in the garden. They tend to congregate on plants that are under stress from overheating, lack of water, and more. Healthy plants without stress are of less interest to aphids. Knowing this can help us view them in a new light and begin to understand how to bring balance to the garden to lower their population.
Listen to my podcast all about aphids if you want to learn more
To understand all of this, we will discuss it further in this post.
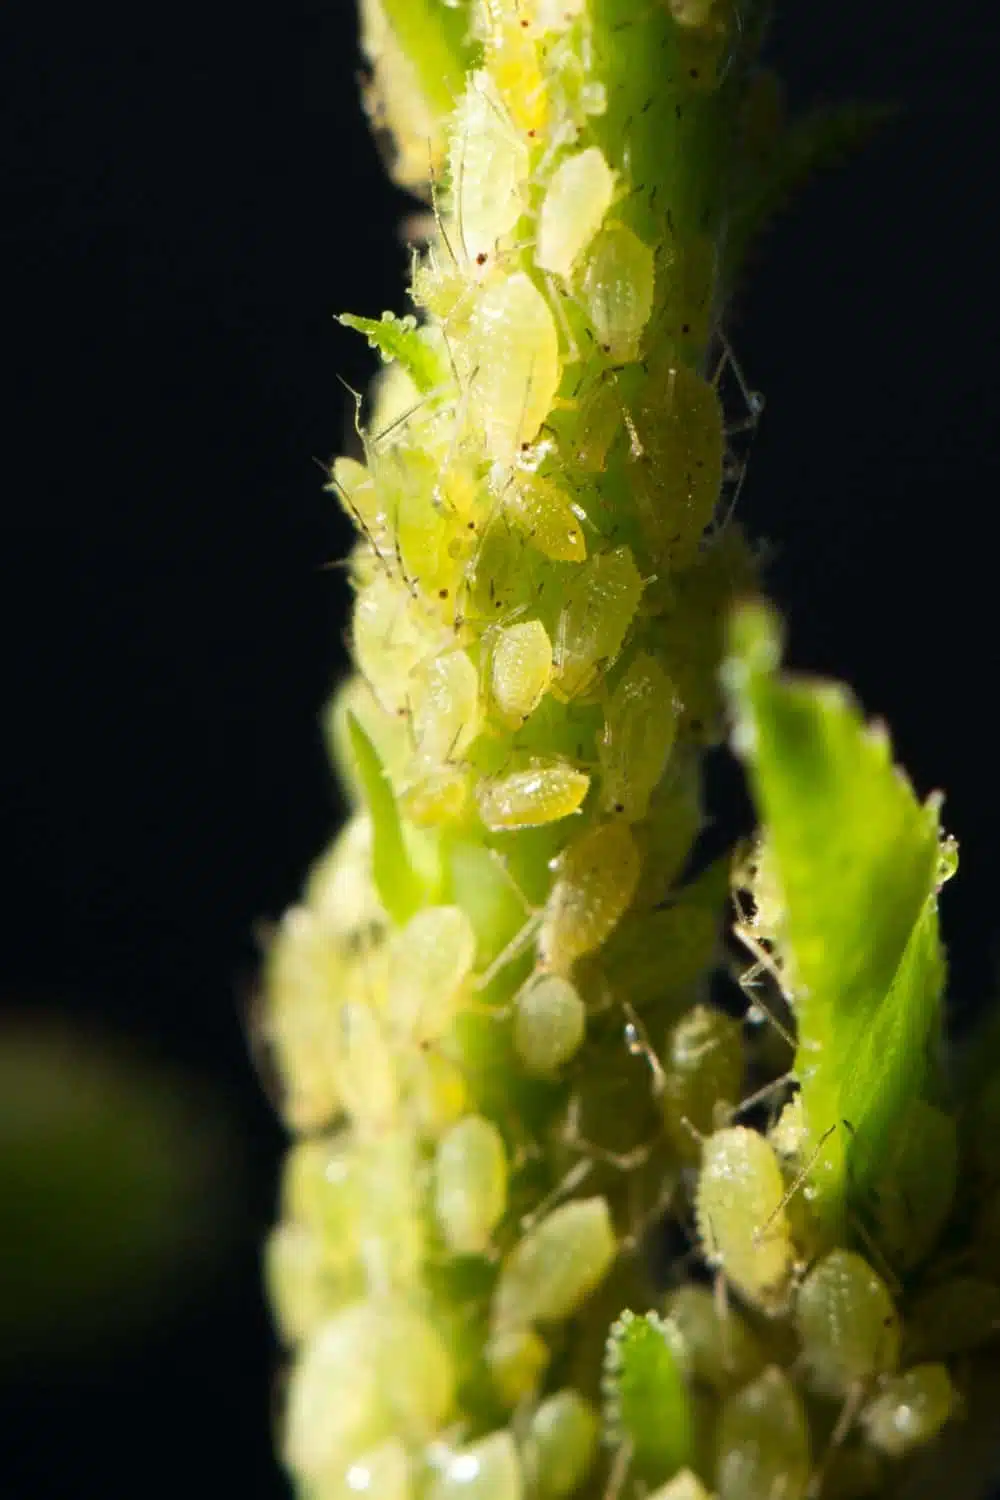
Aphids are small, soft-bodied insects that are sap-sucking pests of plants. They are found worldwide and can be a serious problem for gardeners and farmers. Aphids come in various colors, including green, black, red, yellow, brown, and gray. They are typically about 1/16 to 1/8 inch long.
Aphids feed on the sap of plants, weakening them and making them more susceptible to disease. They can also transmit plant viruses. Aphids reproduce rapidly, and their populations can grow quickly. Aphids can reproduce both sexually and asexually. They typically reproduce asexually, meaning they do not need a mate to produce offspring. This type of reproduction is called parthenogenesis.
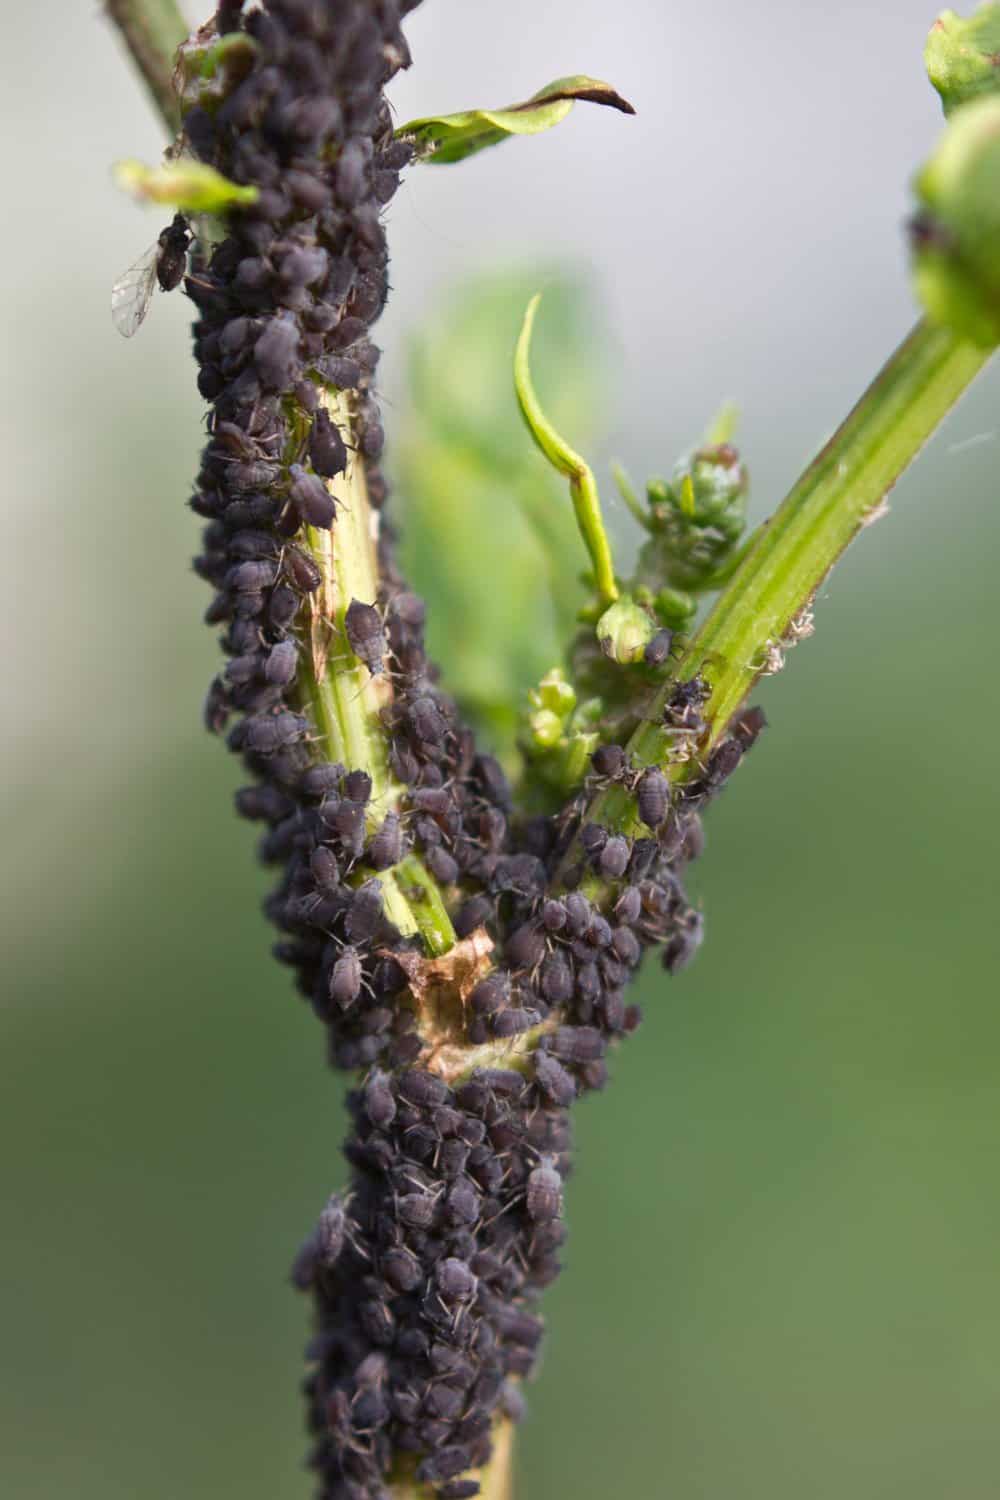
Because aphids can reproduce both asexually and sexually, it seems they overtake your garden so quickly. One female without reproduction can produce over 100 offspring in her lifetime. In the fall, they reproduce sexually, allowing them to store eggs quickly that will overwinter in your garden and open early in the spring.

Many ways to deter or eliminate aphids also greatly benefit the greater ecosystem. This means that while you are deterring a rather harmful pest, you are also naturally building a greater ecosystem around you.
There are many natural ways to deter aphids with homemade things. We will start here, but I have controlled our aphid populations enough to never use any of these natural solutions for aphids.
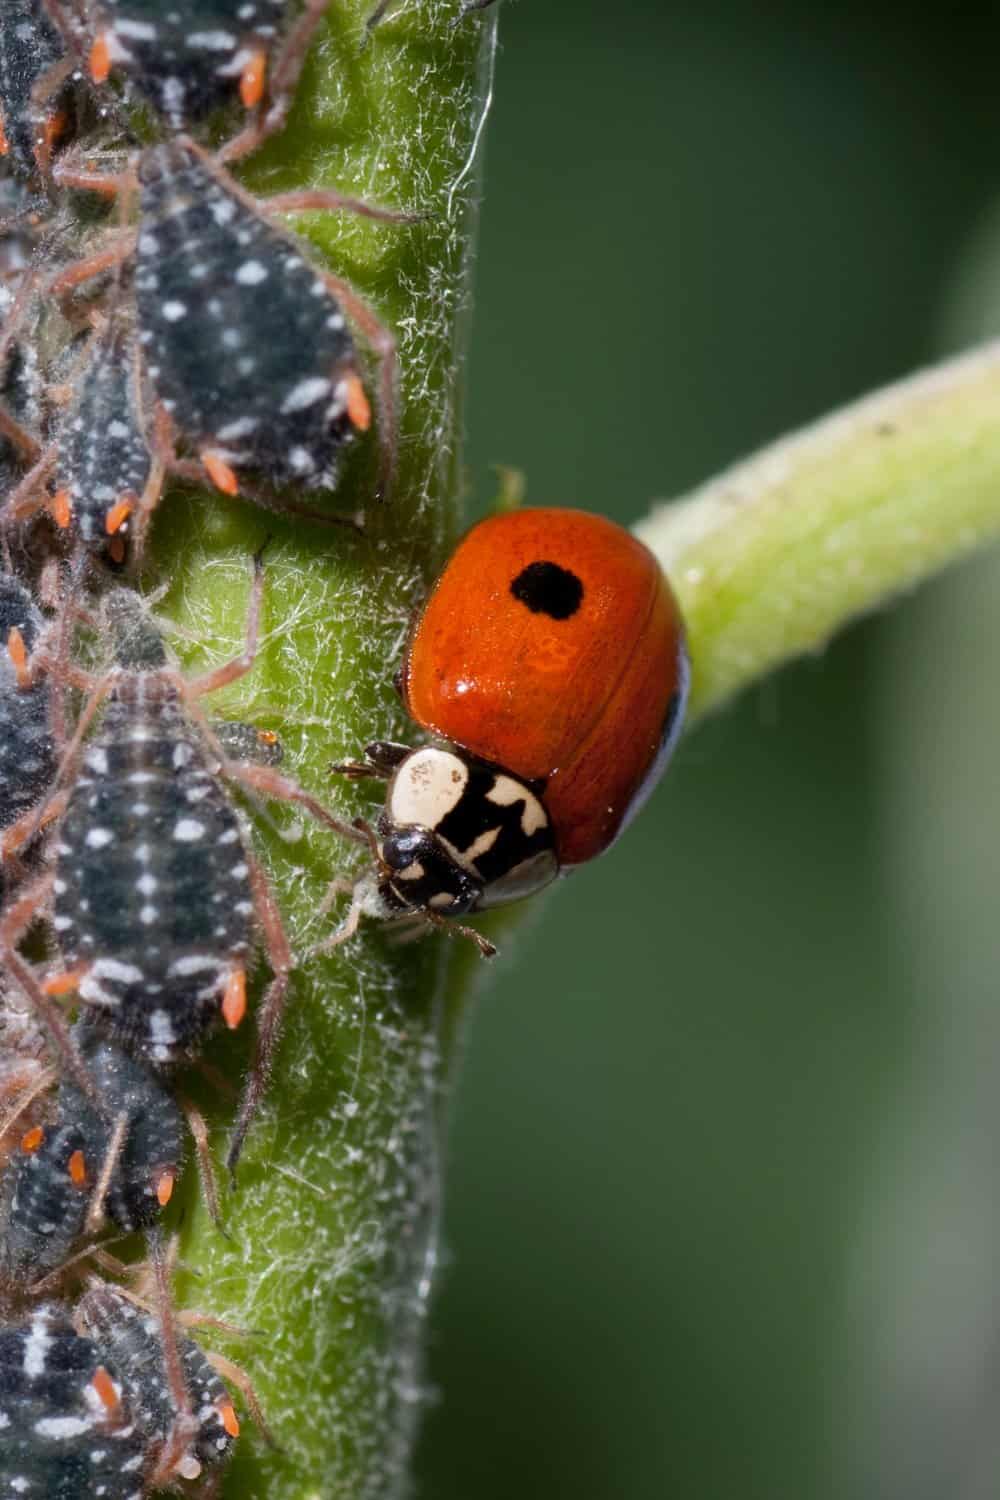
The most important thing is understanding how to use beneficial insects in your garden to control and keep aphid populations in check. The following beneficial animals and bugs will keep your aphid populations in check and healthy and normal. Below you will find the main predators of the aphid and a few tips on how to attract them:
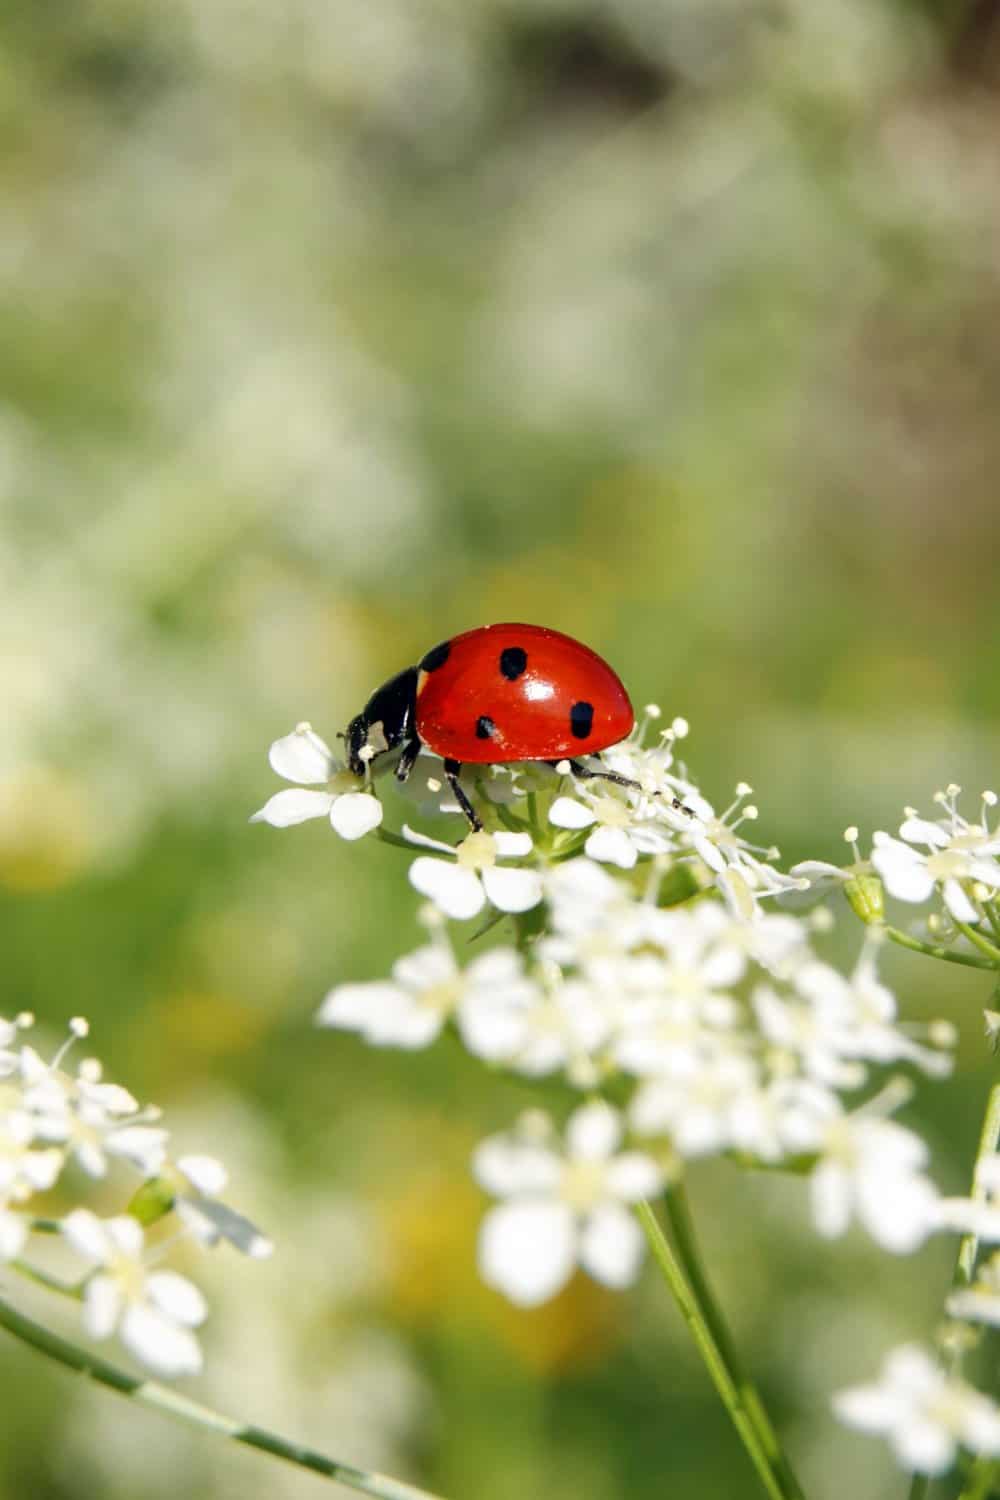
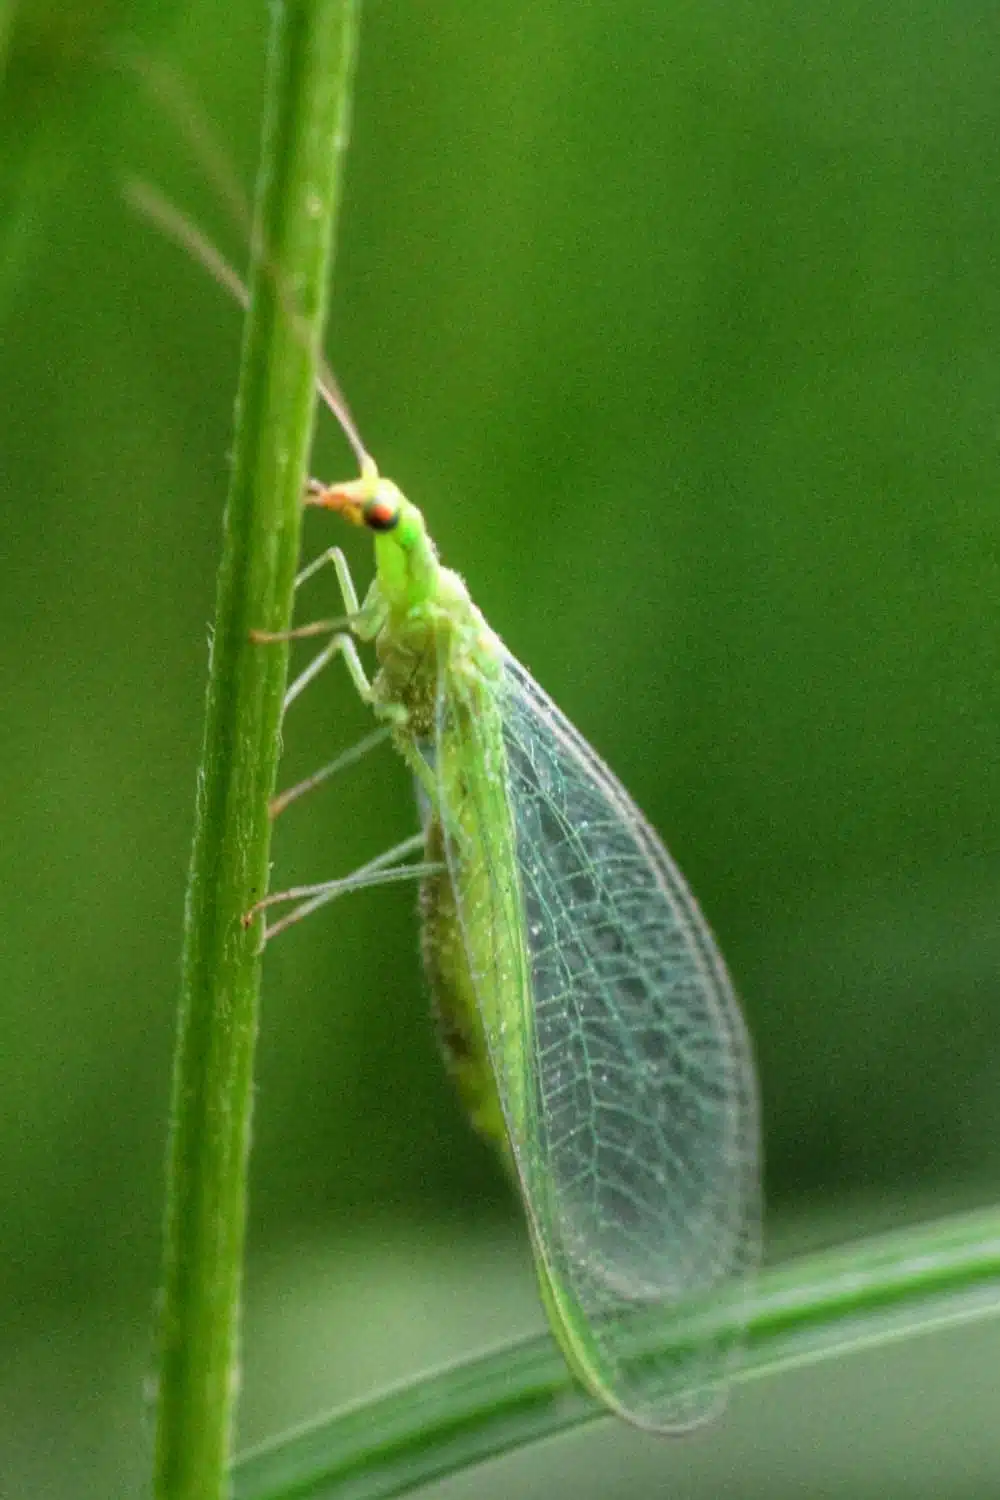
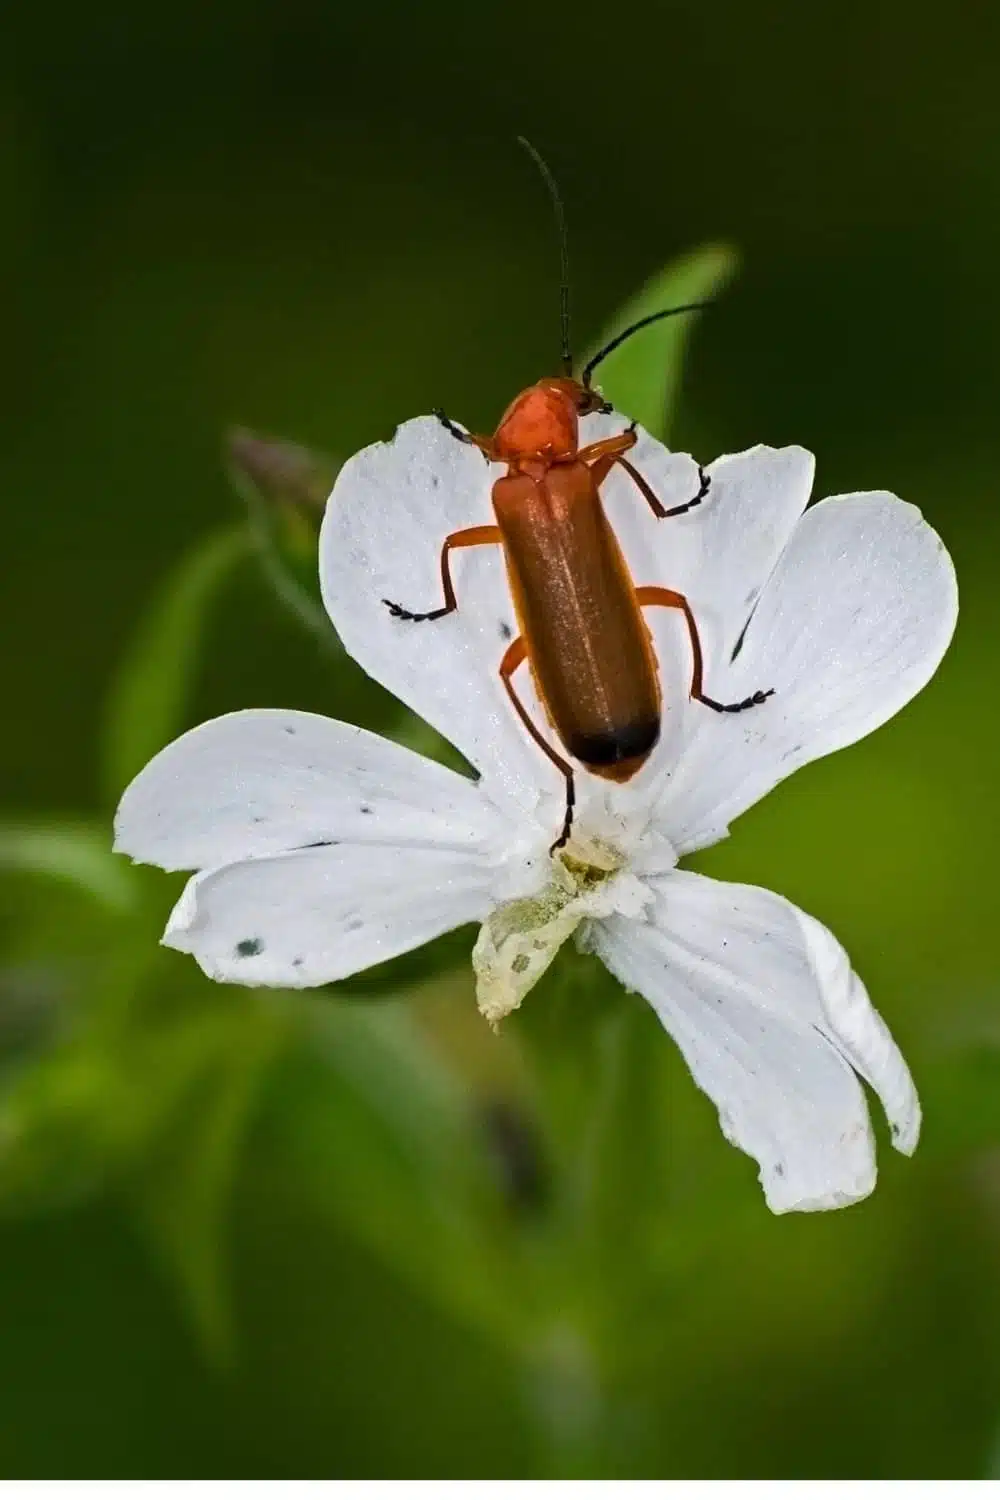
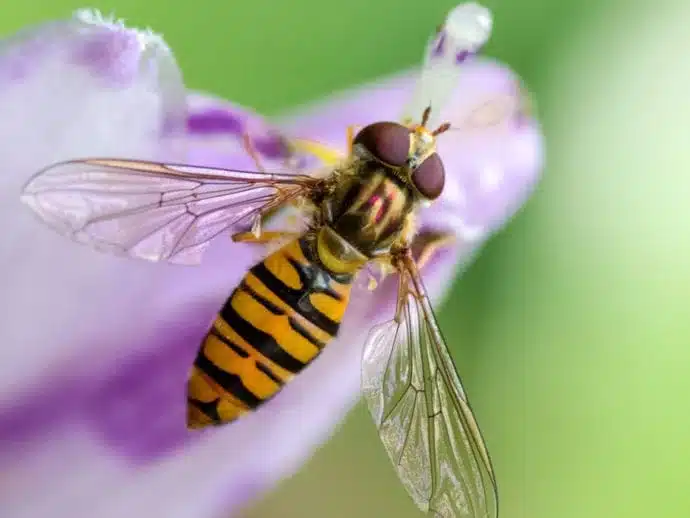
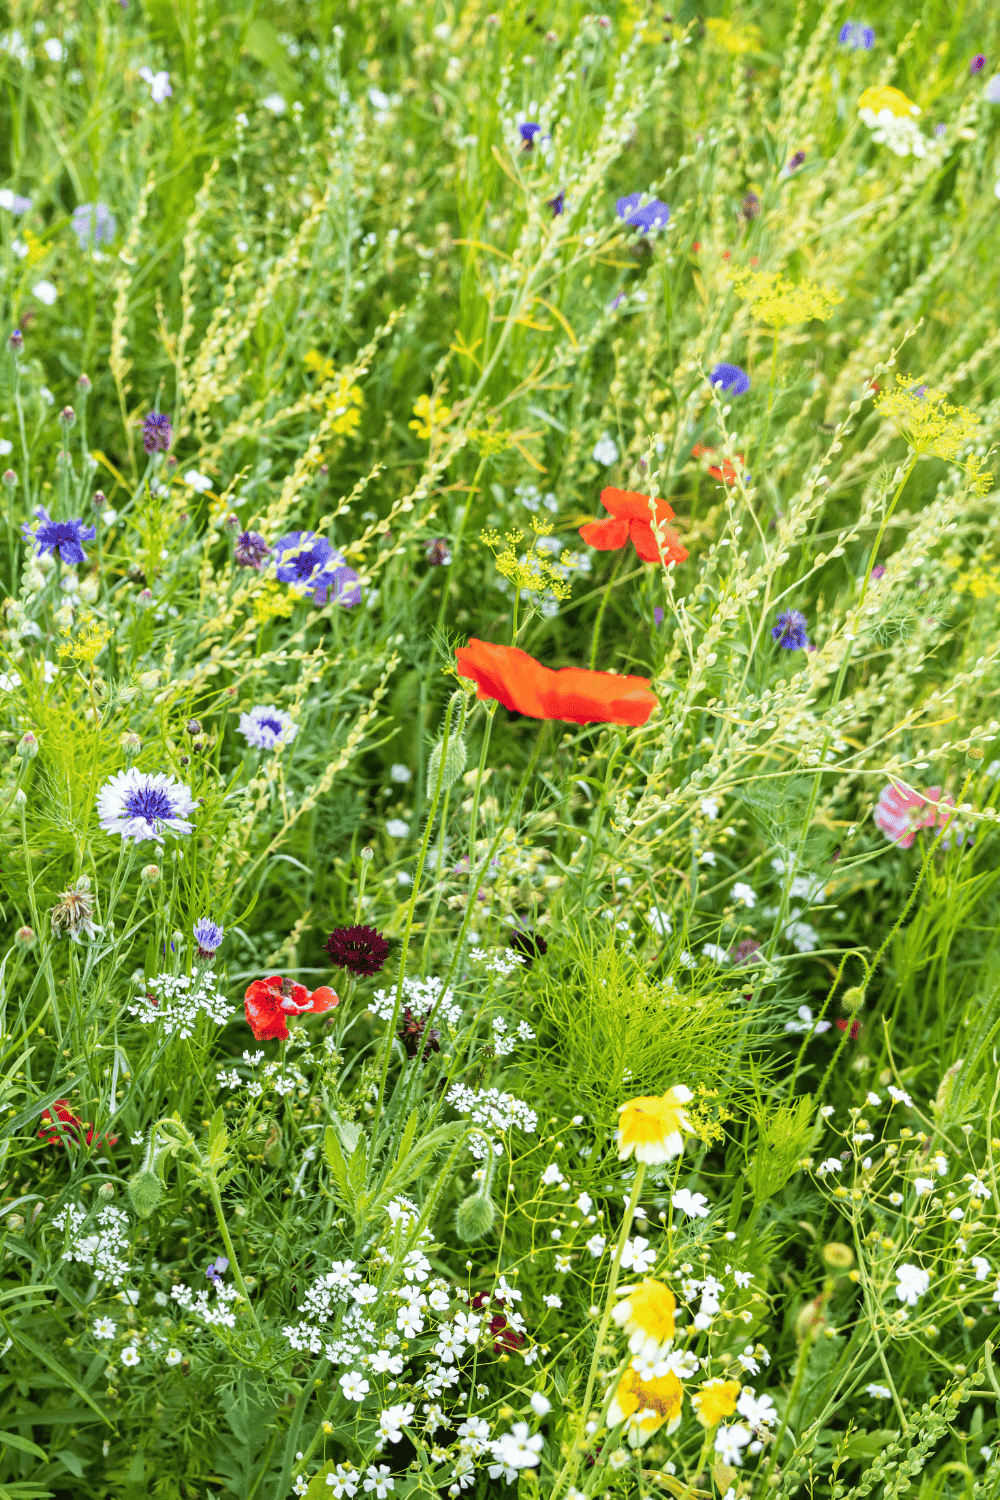
Growing many of the above plants will bring in plenty of predators which naturally feed on aphids so that you can naturally get rid of aphids without sprays or much thought on your part. This will also create a gorgeous and productive garden naturally as well.
The best natural way to eliminate aphids is to build a robust and healthy ecosystem to control the aphid population. By growing a full ecosystem of lots of flowering and perennial herbs, native plants, and perennial flowers, you will find that the aphid population will remain healthy. Aphids are a wonderful food for some of our garden’s most important bugs and birds. A complete food web is how we can grow a great garden without intervention.
Aphids are a part of almost any garden. This means we must simply find natural solutions to controlling and preventing them through building a more robust and healthy ecosystem, as this will be the best natural way to get rid of aphids in our garden over time.
In the meantime, there are plenty of natural solutions you can make at home to lower their impact on your garden while you build a healthy ecosystem and attract beneficial insects that enjoy eating aphids.
If this blog post was helpful, you may also want to check out these other posts for greater natural gardening ideas:


Your garden is somewhere you work hard on, and the last thing you want is to have it decimated by deer. This means you must have a plan to build or construct a garden fence that will keep out deer and other pests from your garden. I would suggest looking at this post on the Top Tricks to Deter Deer From Your Garden, but in this post, you will find some inspiring fence ideas that will naturally integrate into the landscape around you. These fences will be easy to construct and are options for cheap garden fencing.
Building a garden fence is a great way to do a few very beneficial things for your overall garden’s health.
The cheapest garden fence is one that uses found materials like quite a few of the fences below, such as a gathered stick and reclaimed wood fence or a brush fence. If you want to use newer materials, we engineered this DIY Garden Fence to be as simple and inexpensive as possible!
When building a garden fence, you must begin with a few key things. Your type of fence will determine exactly how it is built, but every fence begins with a few key things to the build:
I detail more about how to build a garden fence in this DIY Garden Fence post if you would like to see how we created our garden fence for our vegetable garden in northern Michigan.
Here are my top picks for garden fences:

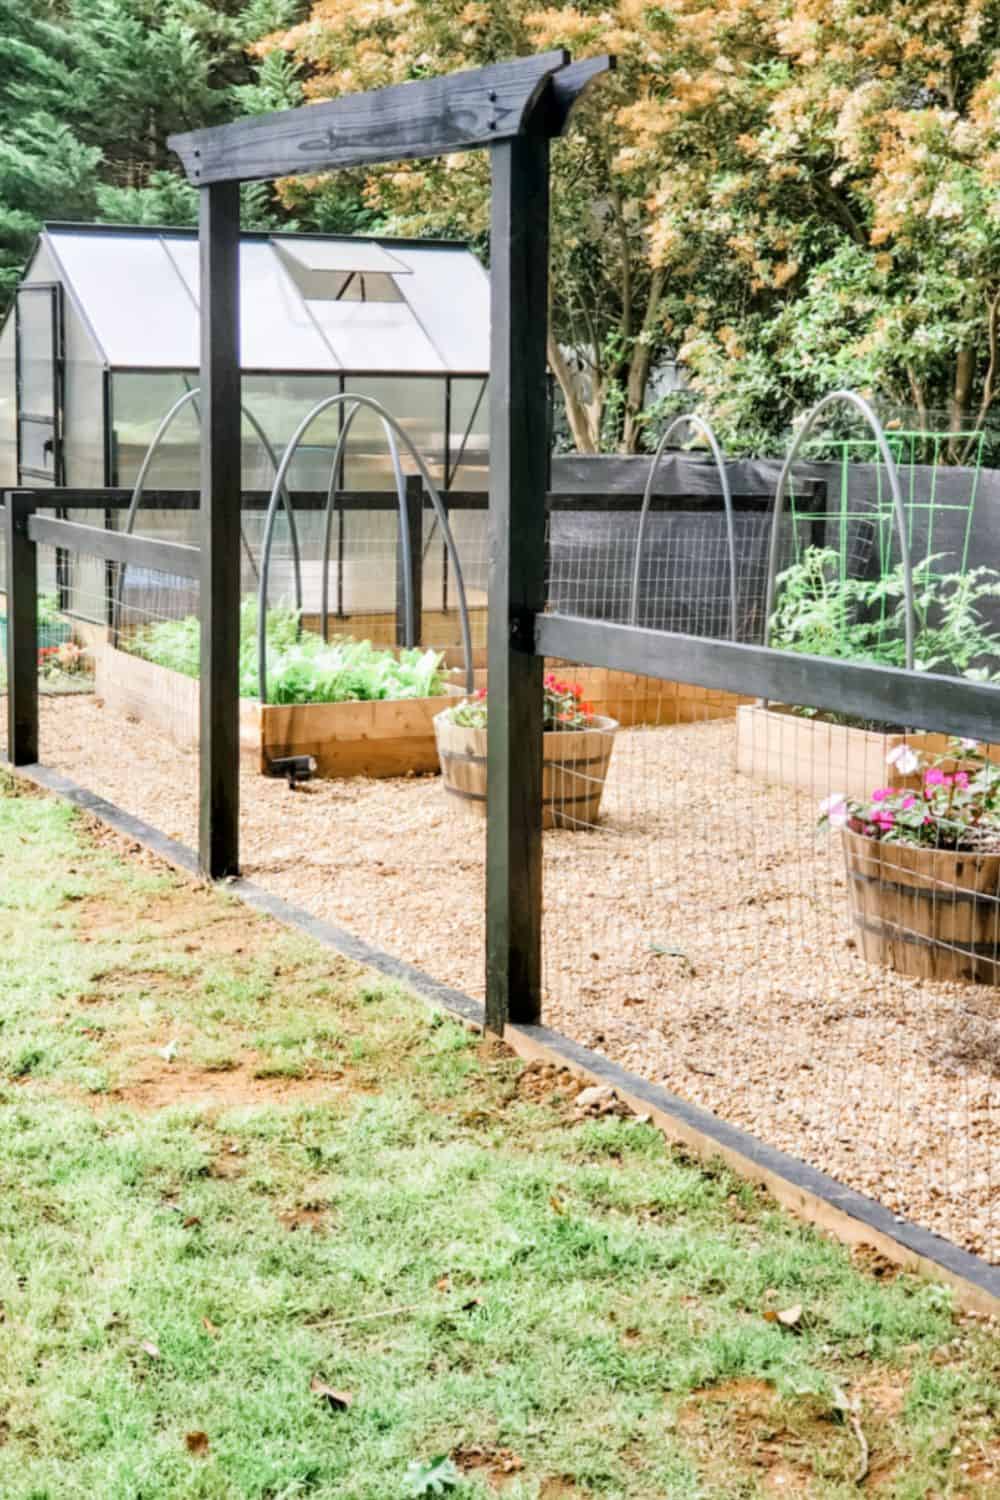
This DIY Garden Fence design is from us here at Fresh Exchange. We swear by this fencing system. It is a great simple, easy way to protect your garden with strong materials, less work, and lower costs than wood alone.
You can get the full DIY here on our blog post about the DIY Garden Fence.
This DIY is a simple garden fence design created by Stacies Spaces. I love adding color over the wood to protect it and add more character here. This is easy to change the gauge of the wire for better pest control. This would also work to deter deer from your garden as well.

I love a natural fence that uses what is already existing in nature. The simple fence is easy to make by gathering sticks and fallen branches and nailing them into a board. You can make it as tight as you want as well. This allows for pest protection of deer and rabbits but also will offer somewhere for your peas and beans to climb.
Camilla Jørvad captured this fence design.
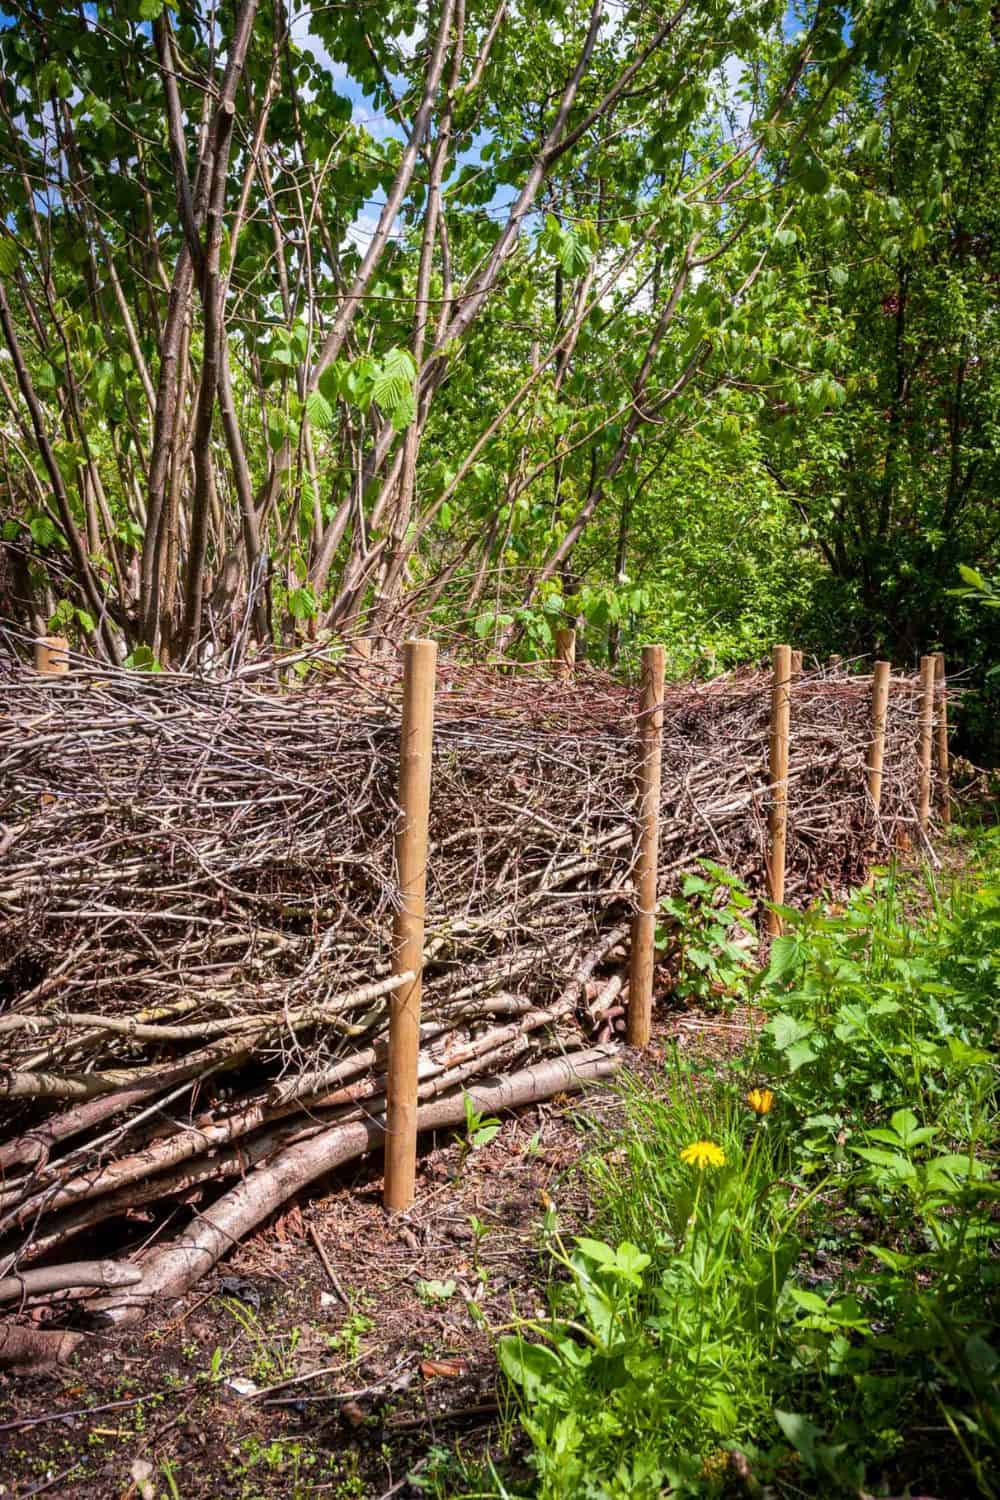
Another great way to make the most of what already exists to keep your fence cheaper is using this simple and natural method of creating a Brush Fence. It is a very great way to keep animals out but to use existing materials and create a natural haven for bugs of all kinds!
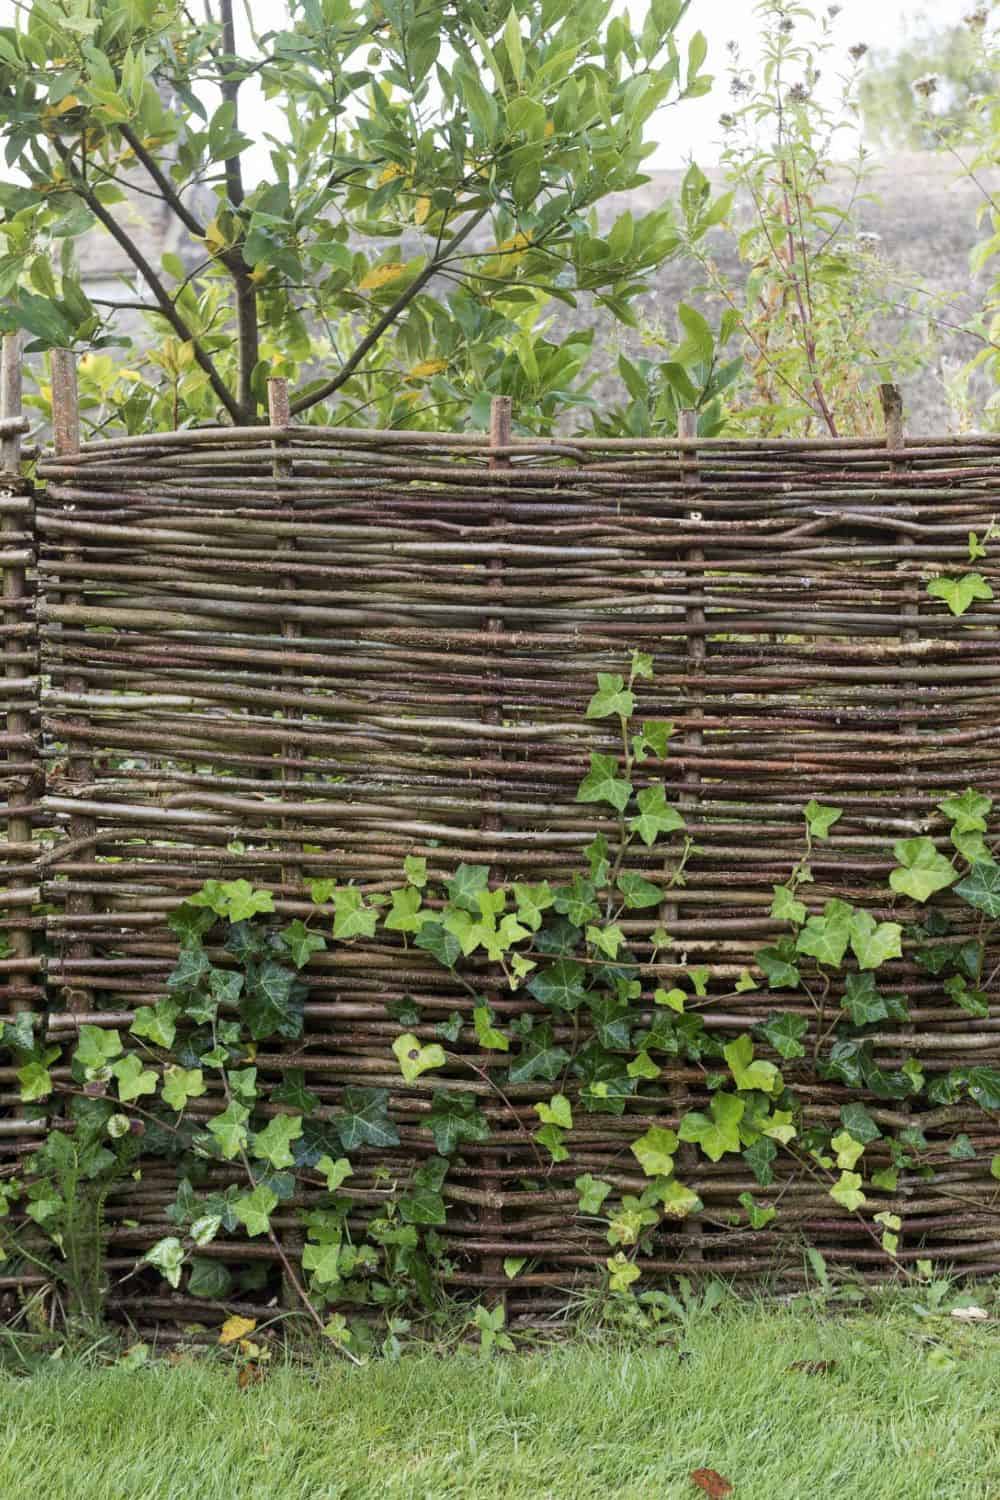
I love this type of fencing because, like the Brush and Gathered stick idea, you can use existing materials. This keeps costs down, but it can still be beautiful and special in a garden. Using these sorts of materials takes some skill, but this post from Gardenista gives some great ideas to get you started on creating a great DIY waddle fence for yourself.
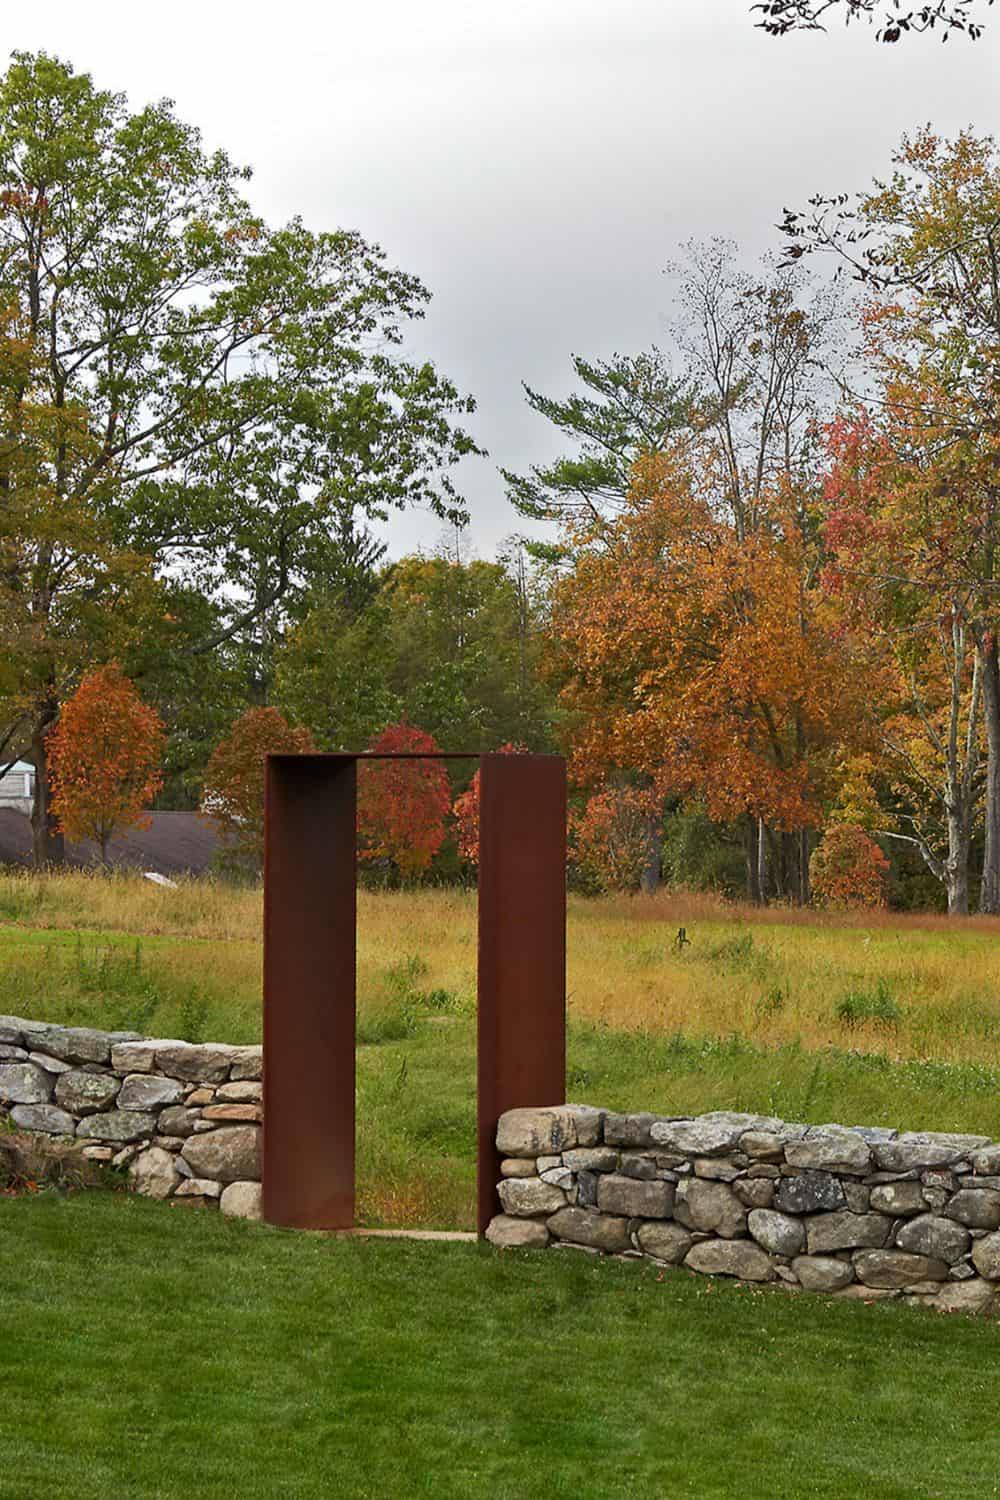
Material mixing can be a really great way to create a garden fence. You can use dry stacked stones with corten steel metal to create spaces and lines that will protect your garden well. Stimson Studio created this fence.
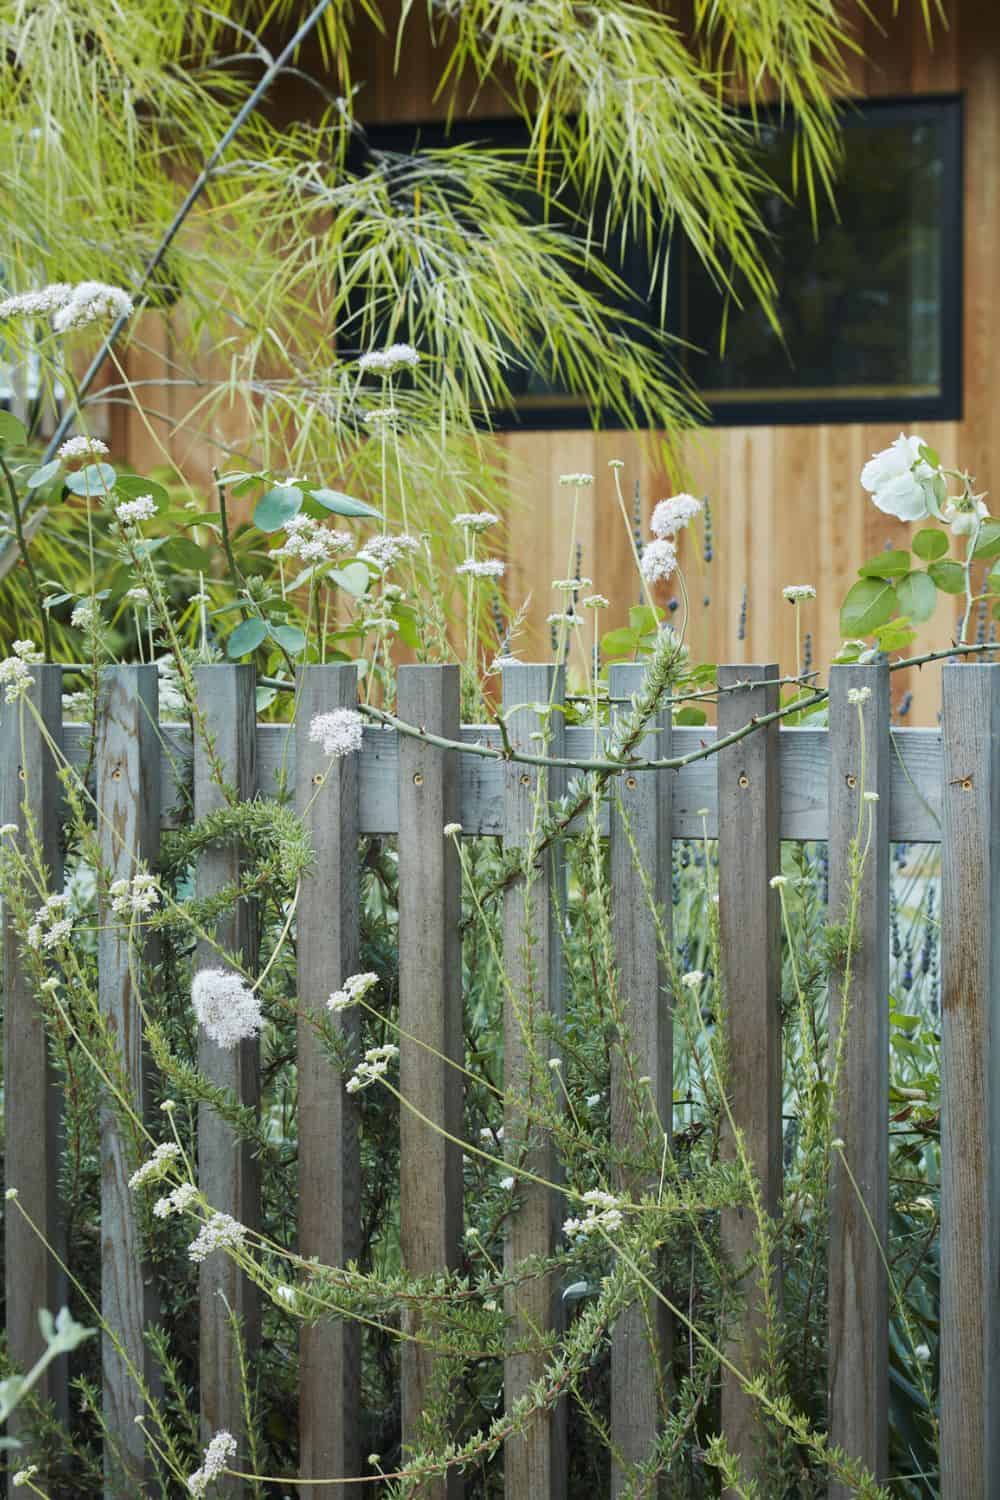
The picket fence life doesn’t always connect with the Cape cod style home. Instead, you can create this sort of fence like Terremoto Studio did. Cutting cedar in the same stripe sizes and heights will lend to a modern-style fence that keeps your garden safe from predators and pests.

This fence DIYed by Honey Built Home uses a great fence-building system from Lowe’s which makes this modern horizontal fence far easier and straightforward to build yourself.

You can keep out pests, particularly deer, with natural hedge fencing. We keep our kitchen garden deer free with a natural fence around the garden using Viburnum, Hawthorne, and Hazelnut. You can do the same by installing them and using them to keep deer out of your garden too.
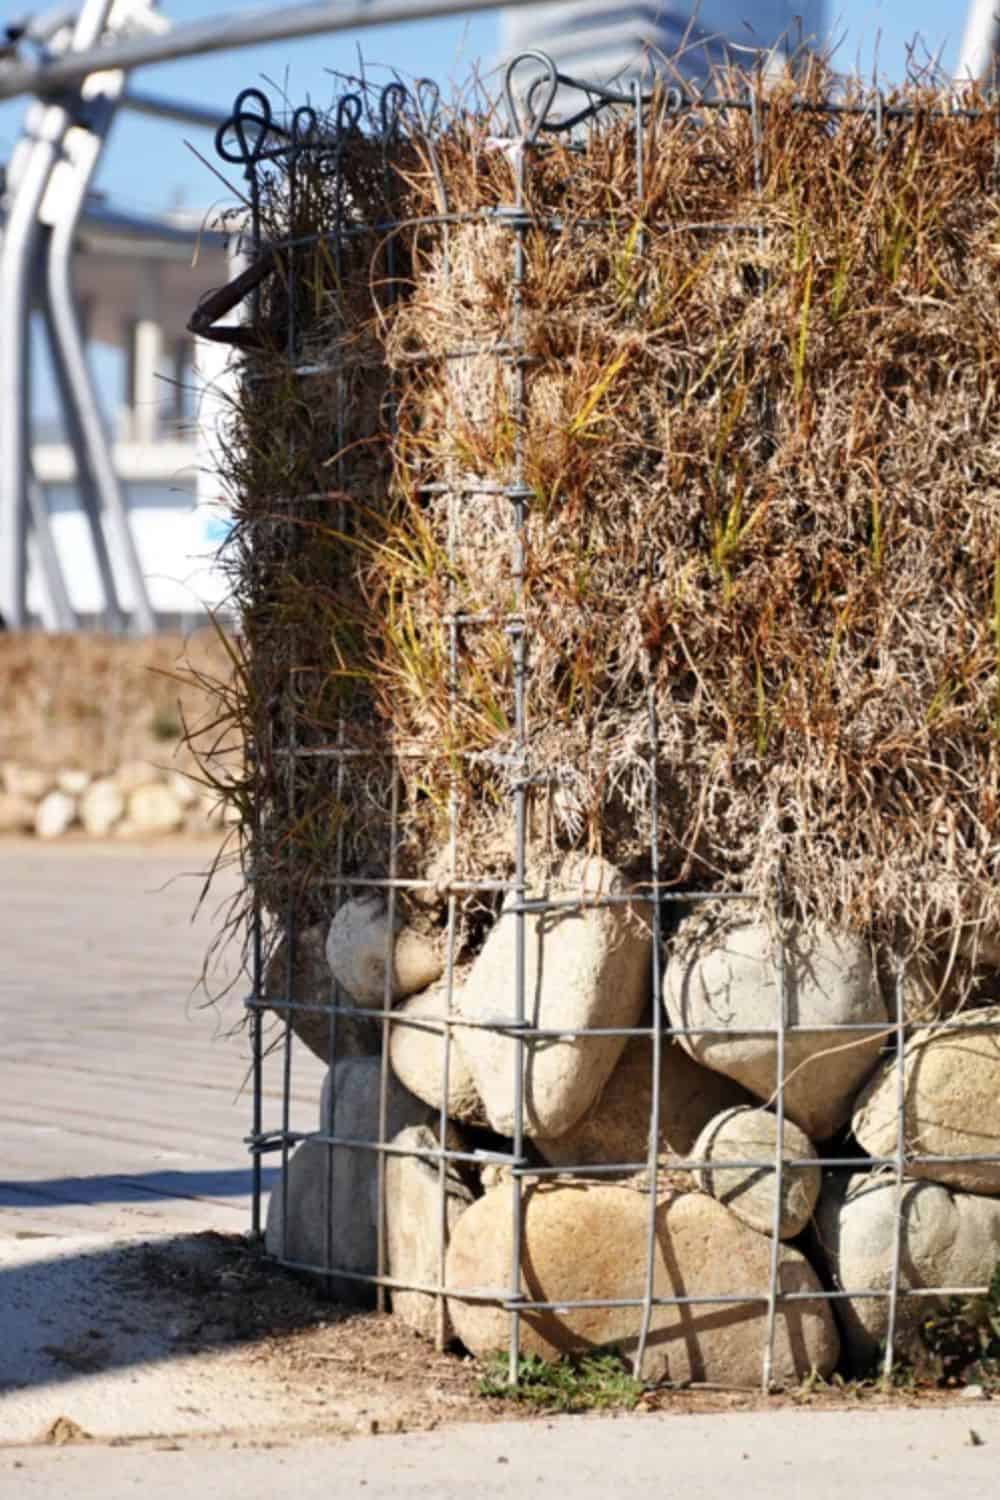
Gabion fencing is utilizing a cage system that will hold natural materials. These can be almost anything from wood to stacked stones and more. Heading to Pinterest or Google and searching this term will present many beautiful and insightful ideas. This one, in particular, I found lovely from Life of an Architect. I think you will love this natural and easy-to-use fencing idea, particularly for modern and post-modern designed spaces.
These fence ideas are all really amazing and give a wide range of ideas for those looking for the best garden fence idea that will fit in almost any budget, while still providing modern and tasteful design. Many of these garden fence ideas are also natural and good for the environment as well.
Posts you may also enjoy:
